Christmas in Alsace 2015 is the 4th film of a series of promotional short films inviting viewers to spend end year’s holidays in Alsace.
It’s a collaboration between Gaylor Morestin (artistic support), Thery Ehrlich (music) and myself. The project consists of a poster and 2 films: a 2min50 length version and a 32 seconds long trailer displayed in Paris theatres between October 15th and 25th 2015.
This year’s theme was “Christmas tree and its ornaments”.
Film
Trailer

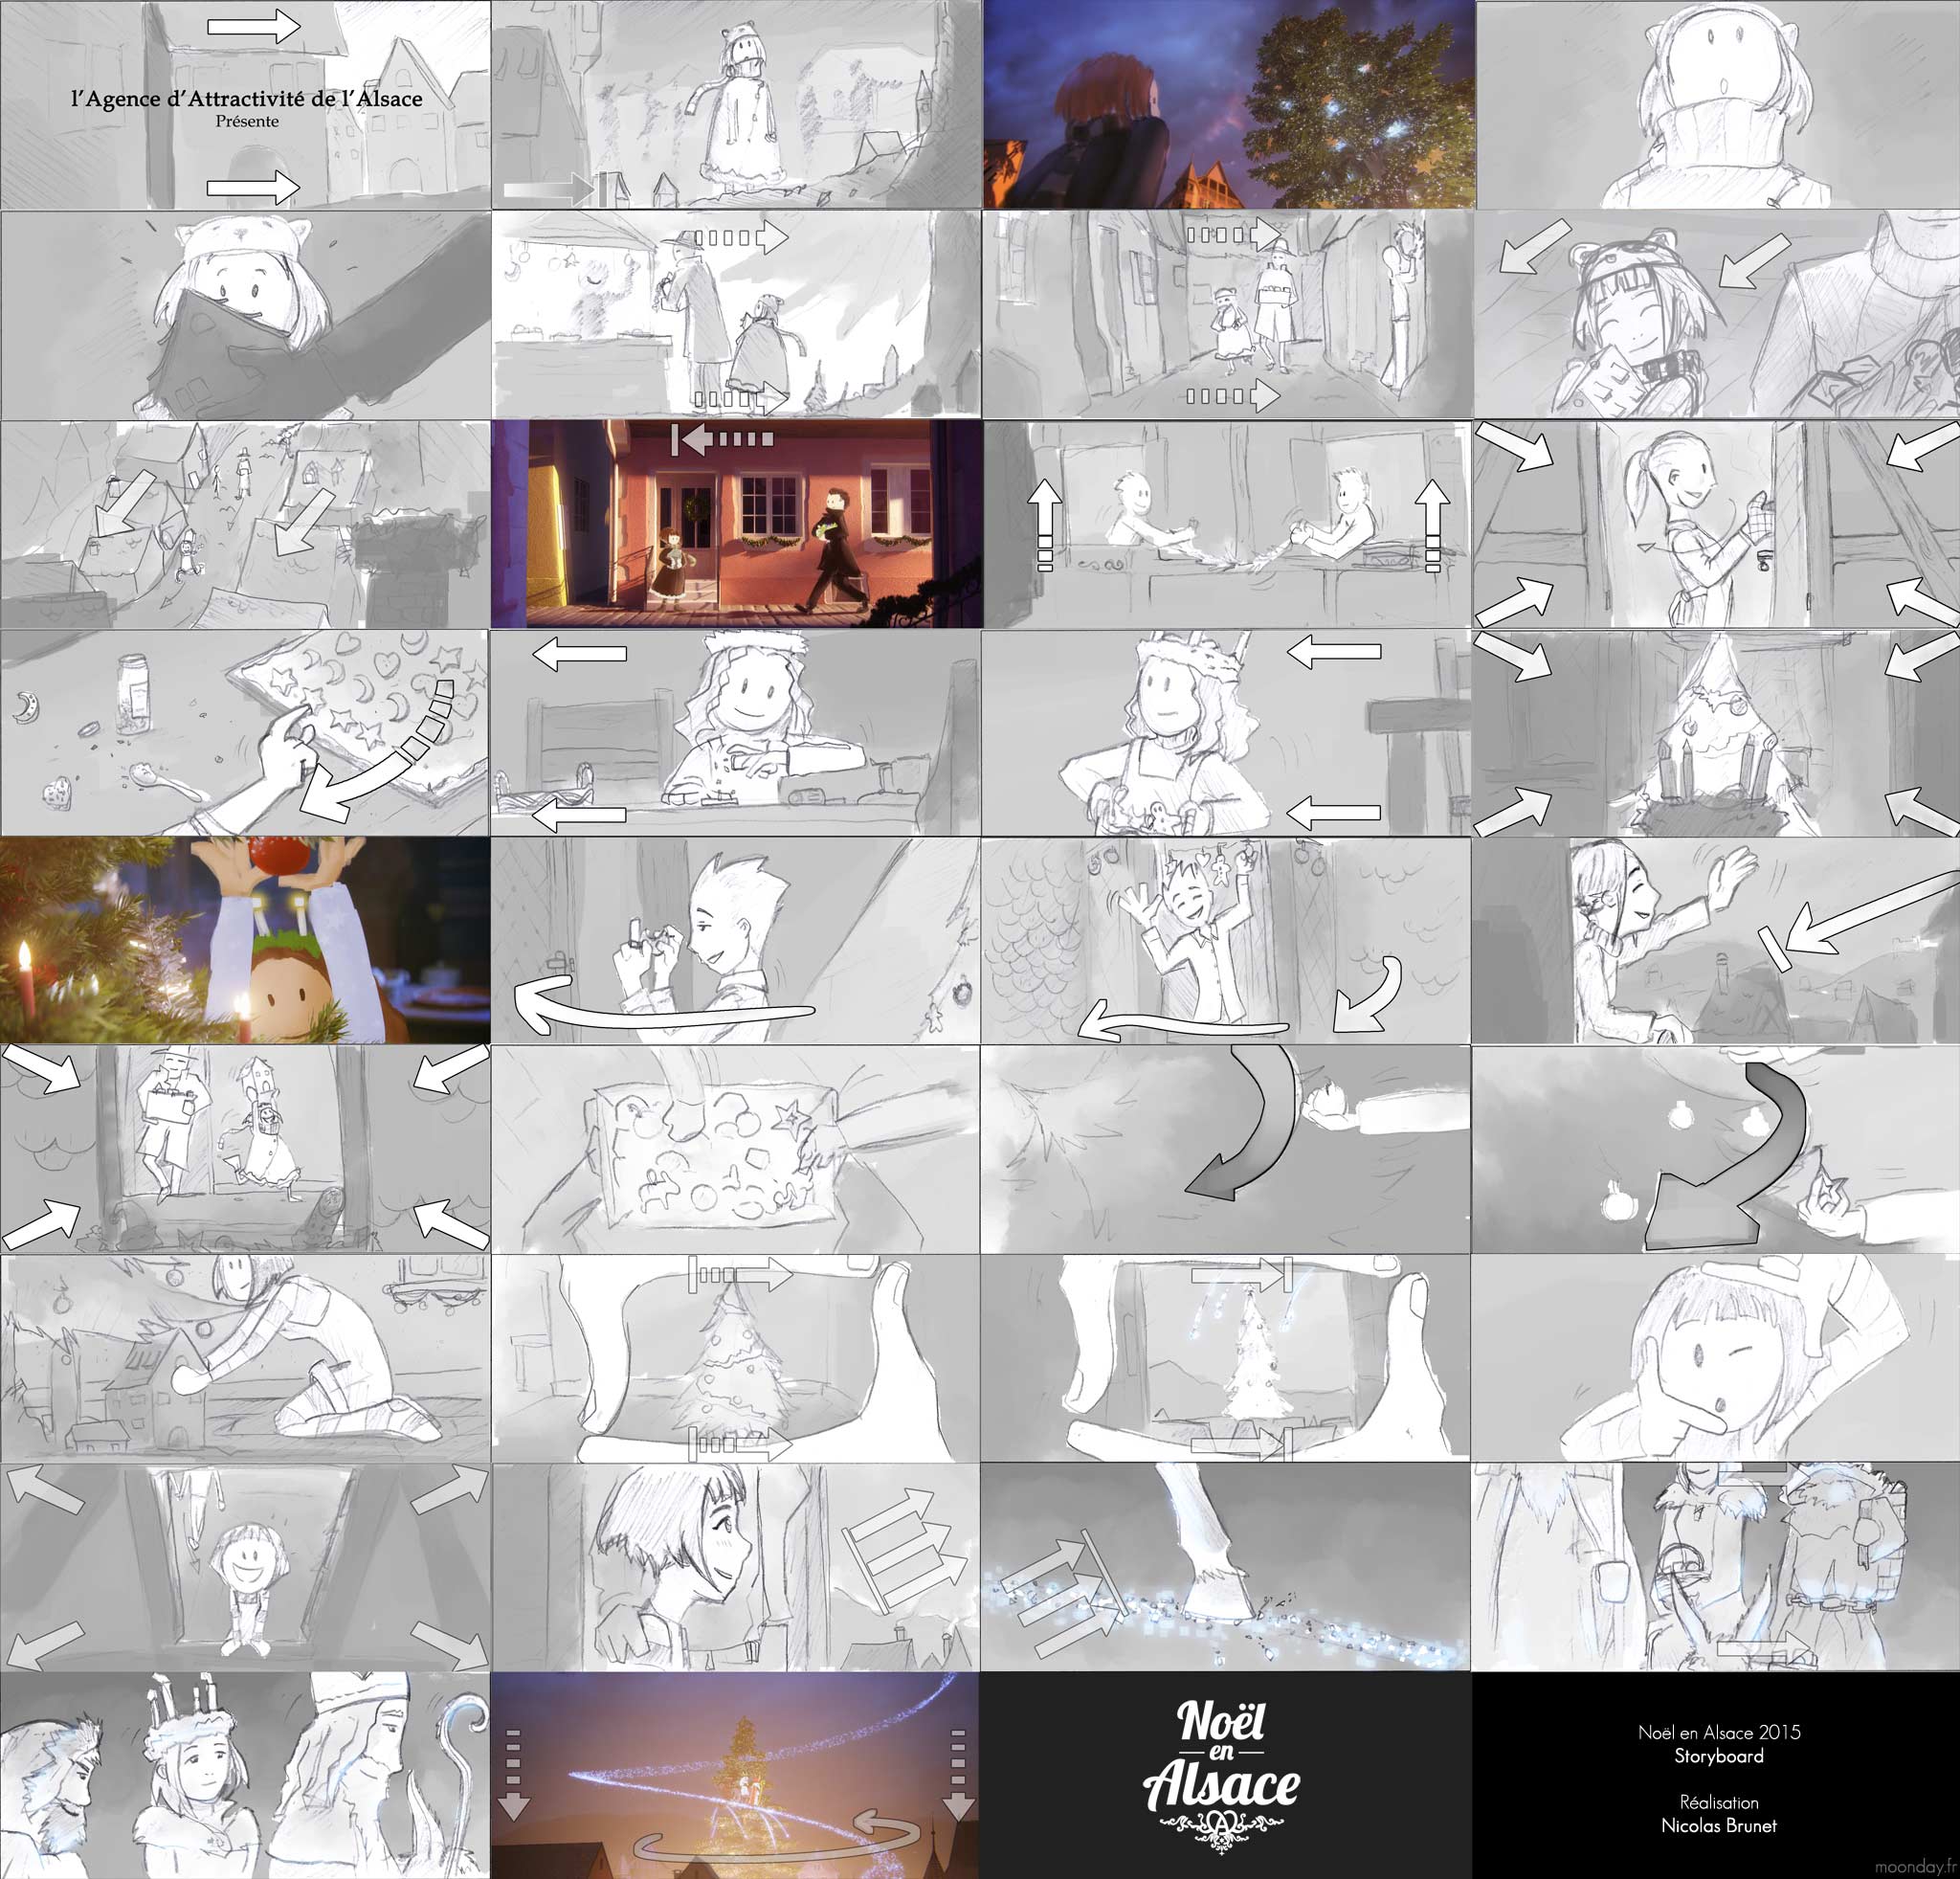
I – Storyboard & Concept arts
Pre production of the film started very early on this episode, around January 2015, therefore I had time to think about a little story I quickly put on paper with drawings and concept arts first, then with the creation of a storyboard. The final scenario is highly similar to the original one, for my greatest pleasure, as I wanted to direct a real short film and not a common commercial film.
Using a less realistic character design gave me more freedom about visual creativity like in the end sequence. After years passed watching CG cinematic films from Visual Works, CG studio working with Square Enix, it was all natural I jump on the occasion to try creating a sequence that looks like those we can see in Final Fantasy games from 2000’s. With all the knowledge gathered through the years and workflows I start to fully understand and use, I wanted to have fun for the end of that Christmas adventure.


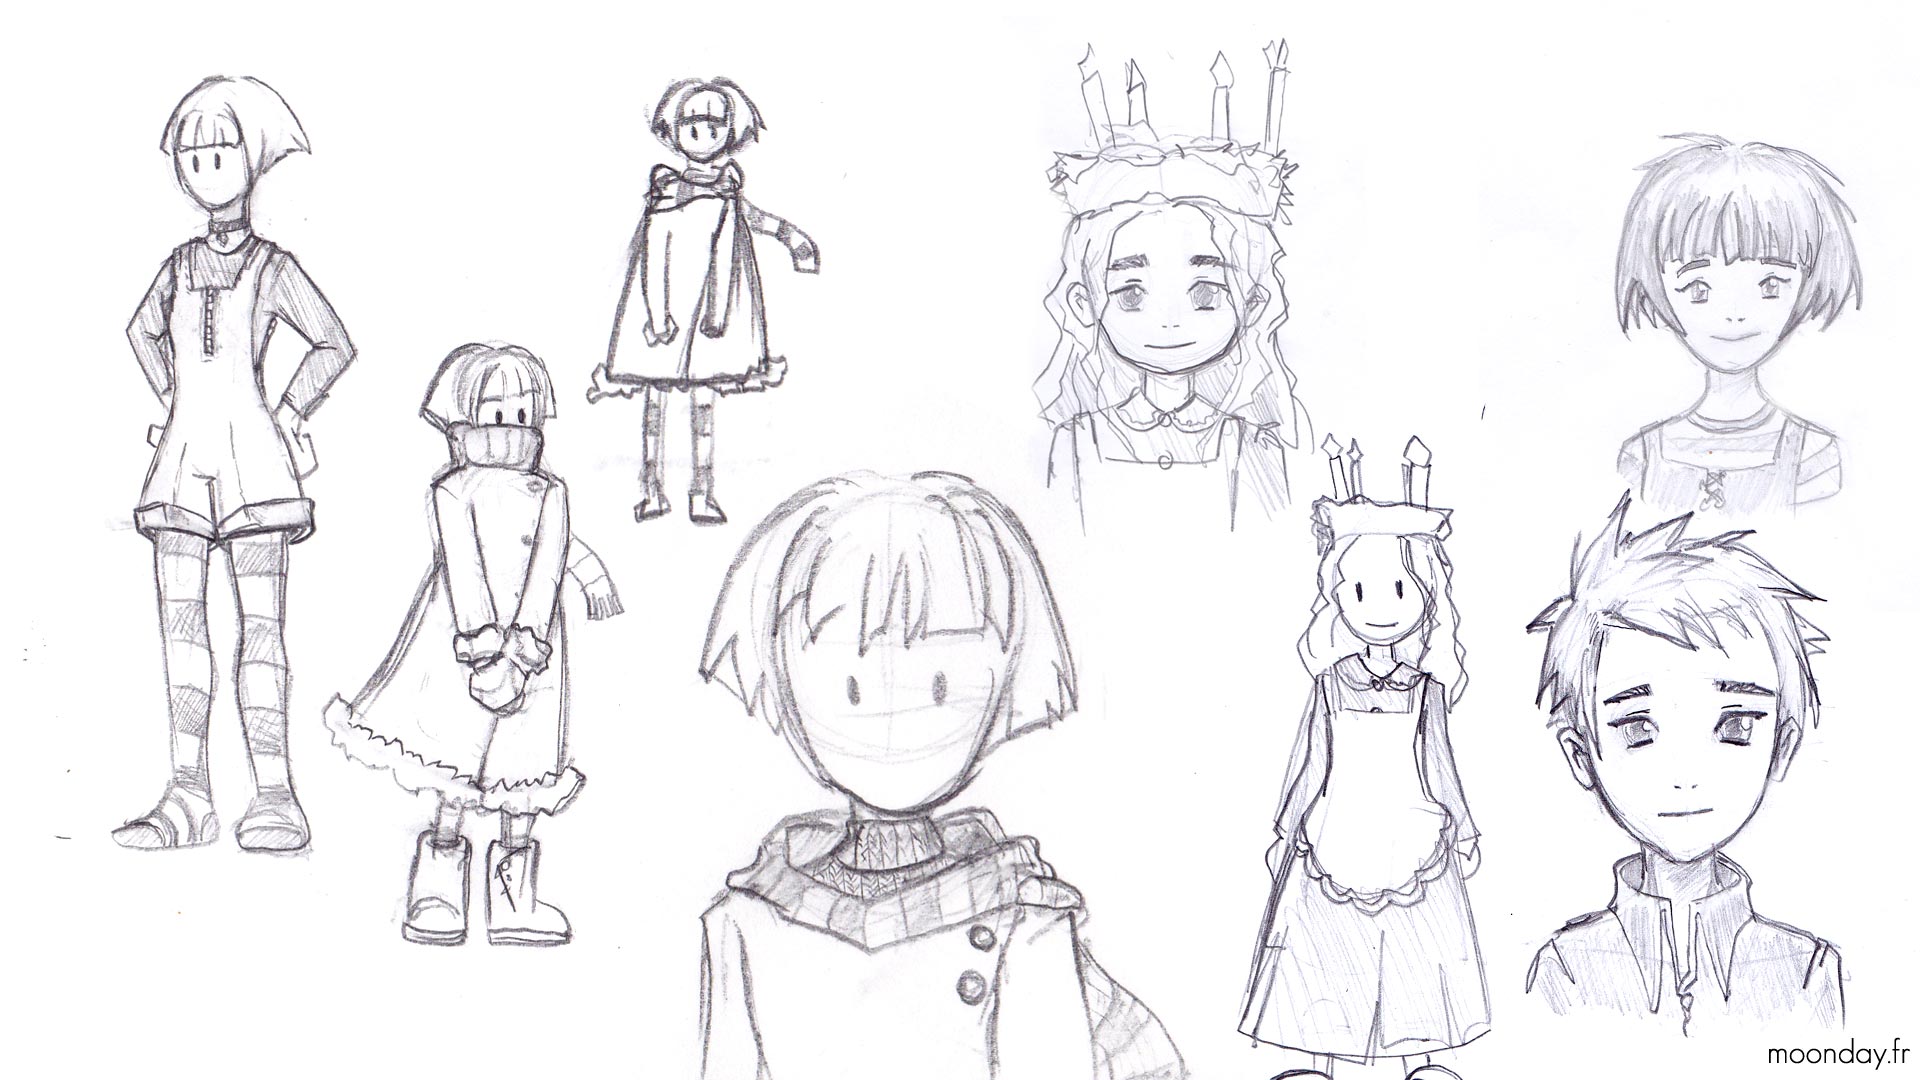
II – Design
After a few drawings and some designs, the main character was born. The idea was to create a child between 8 and 12 yo, that’s why she wears a huge cloak shaped like a bell and a kawaï half bear, half panda hat.
Secondary characters all come from the original model. I used a method I call “the Miyazaki workflow”: use the same head with different haircuts, that works pretty well. There was 4 types of characters sharing the same base mesh: girls, boy, women, man. Man based on boy’s topology and women based on girls.


III – Modelling
Poly modelling workflow was used to create characters. All based on drawings, details were added with displacement maps created during texturing process.
Anatomy of the characters are based on Toru Ehara works. The artist found a good compromise between real and manga anatomy, therefore I used his work as inspiration to create the bodies of my characters.
Most of the film objects are based on real life objects from my house. When I missed references, I looked in my pictures database to fill the gaps.


As this project was a professional misison, using plugins to avoid time wasting was crucial. The 3 most useful were GrowFX, Rail Clone and FurGuides Painter.
Growfx

Evolution of the big Xmas tree until its final form reaching 3.7 millions polygons
GrowFX for tree creation but also garlands and pine crowns. The most challenging tree of the project was the big pine tree we almost see all the time in the film. Instead of creating the tree from the trunk to the thorns, I started from the thorns, then tertiary branches attached to secondary branches and so on, until the trunk to get a 30m high tree like the one we can see each year in Strasbourg.
Vertex color function helped a lot to spread thousands of lights and ornaments only on branches tips. Pine trees + ornaments + lights are 95% GrowFX creation, the last 5% are coming from instanced objects (balls, lights, etc.)


Railclone
In the 2013 episode I explored a few tracks on how to create villages for the final shot of the film. I finally used 3ds Max paint objects module, a long and destructive workflow.
This year, I welcomed RailClone! Once assets have been created (low poly Alsatian houses), all I needed to create was a single array driven by a spline to draw streets full of houses aligned to the spline segments. To test the process, I downloaded a map of historical centre of Eguisheim and drew splines on top to generate a village. The result was conclusive enough to be used in the film.
The plugin was also used to generate some wood floors and roof tiles. It became very convenient to generate medieval pavements on the roads and get random patterns in just a few clicks. A totally non destructive workflow compared to my 2013 attempt.
I definitely couldn’t manually place all the books, DVD and Blu-ray cases in the many furnitures of the film. Here again, RailClone did a great job, after watching some tutorials on Itoo Software website, I could manage complex storage equations in a few minutes.


Photoscan et Populate
To generate the crowd we see during Christmas market scenes, I finally gave a try to 3ds Max Populate module. Since version 2015 we can now bake characters animations and rigs, a huge step ahead.
Populate characters come with spring and summer clothes, this definitely didn’t match the film mood. The solution was to scan winter clothes with the help of Photoscan and then skinwrap the scanned meshes to Populate characters.
Crowd from the 1st shot, a huge thank you to the depth of field.


Smart modelling
inSome elements passed by what I call a “smart modelling” step. Christmas biscuits were covered with sugar using SnowFlowPro plugin, Xmas balls were generated with procedural textures, heroin’s scarf has been positioned around her neck with a cloth modifier… Never hesitate to go deep in the technical aspect, leaving the artistic side for a few minutes, results can be surprising!


Modelling and placement of a scarf with a cloth modifier
Texture modelling
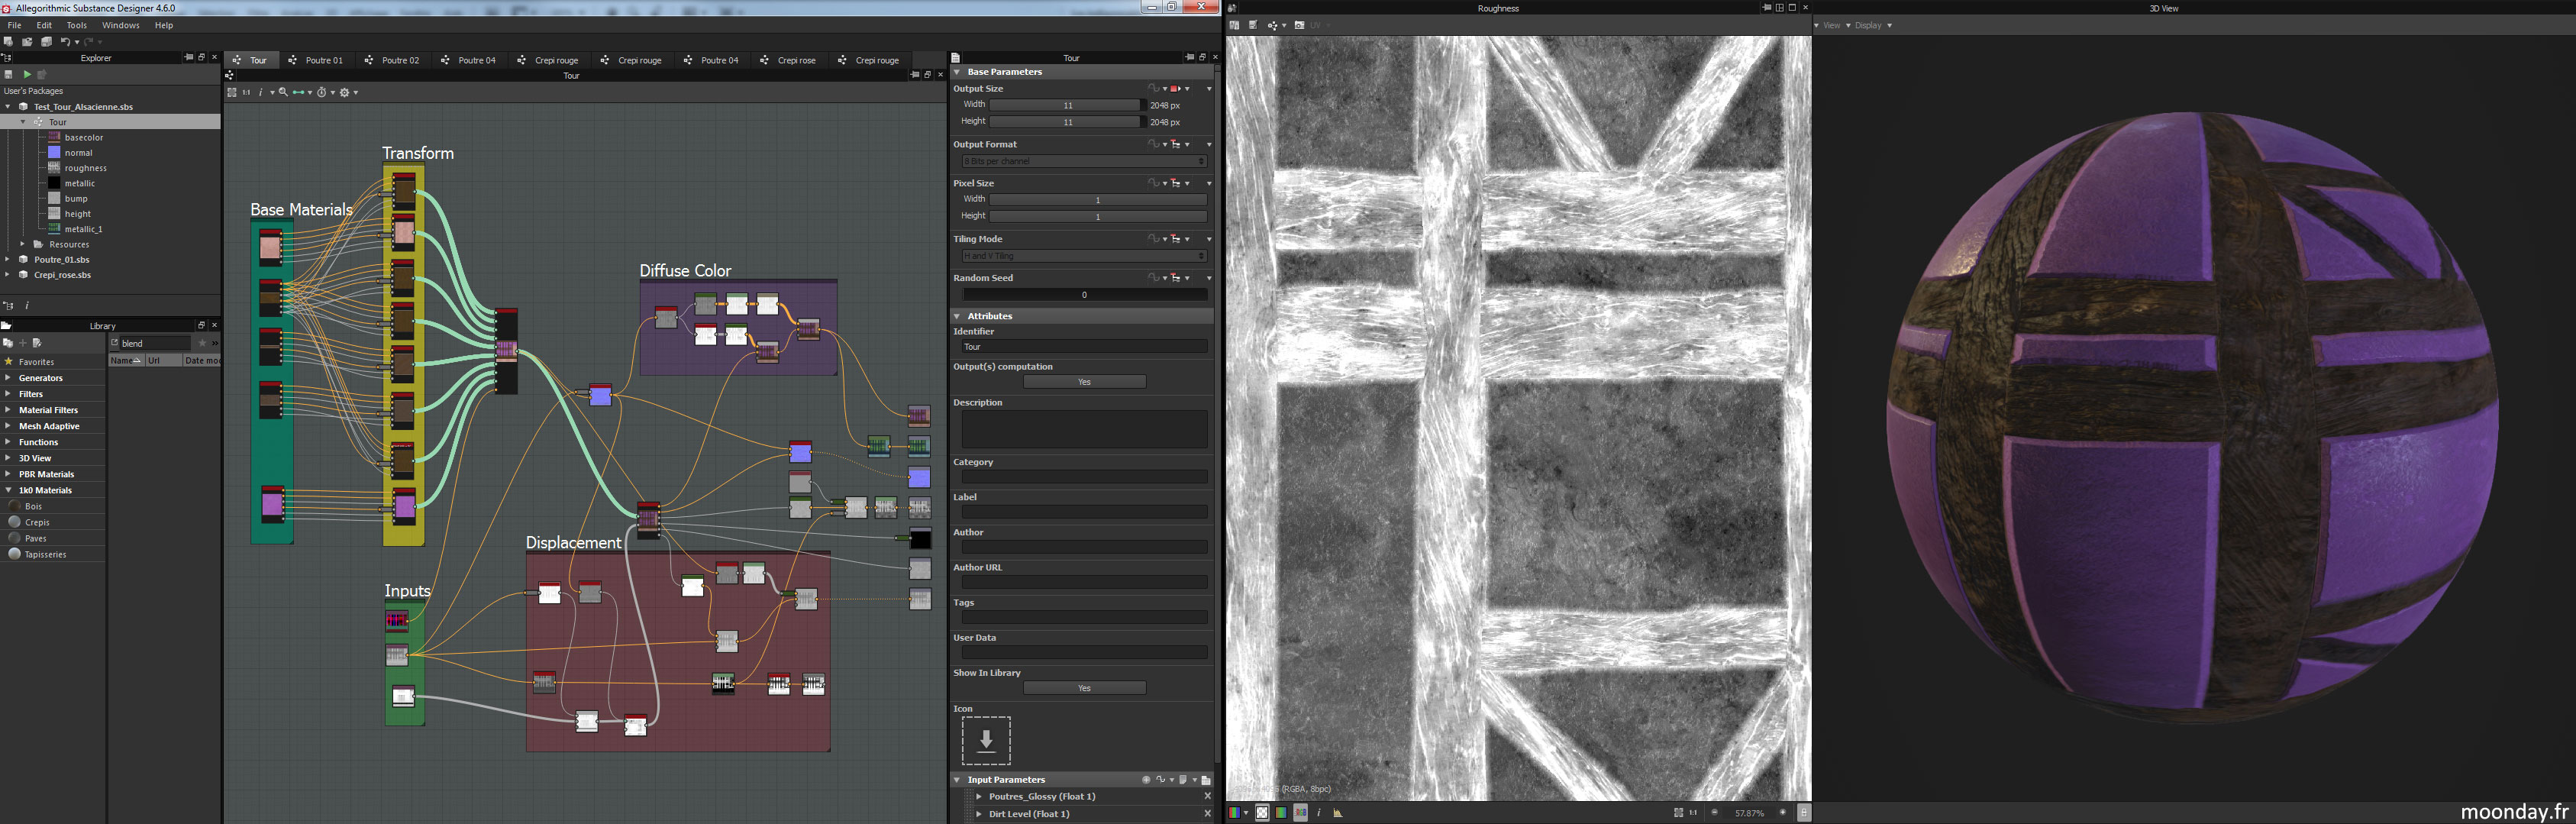
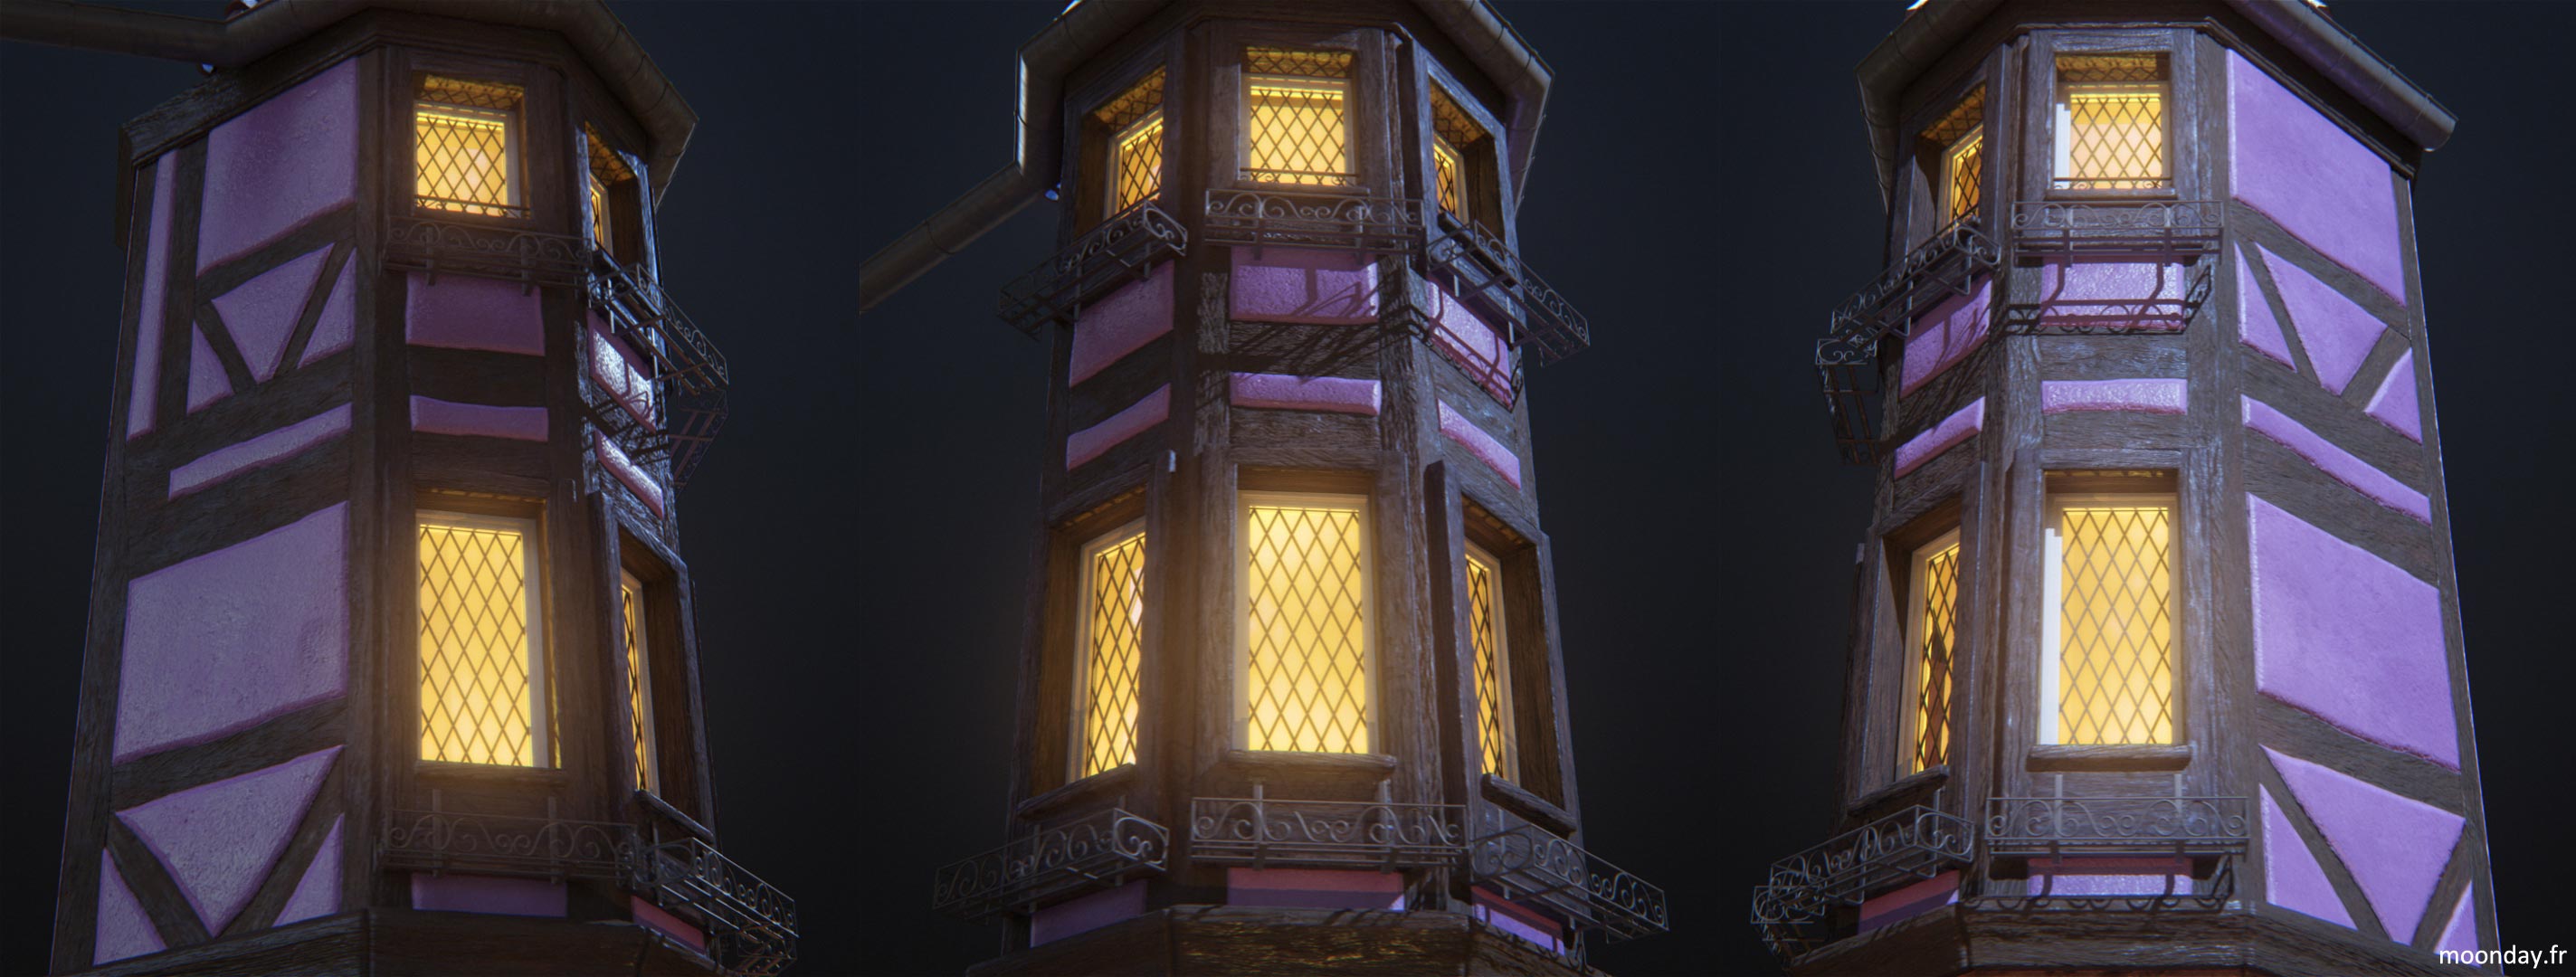
On the same principle, houses from the film were roughly modelled, details come from displacement maps created in Substance Designer, no time to waste in a topology and unwrapping puzzle on each model.
As an example: once a house UVs were unwrapped, I created an ID and basic displacement texture to tell were concrete and wood beams will be generated. ID textures contained as much colours as wood beam angles.
Inside Substance Designer, I loaded materials I created earlier, concretes and woods. Wood materials were oriented with a material transform operator, depending on the ID colour. A multi material operator handled the many instanced using the ID colour map.
Depending on the camera position, roof tiles could be generated from textures using, here again, a Substance material.


On wide shots, low poly houses were scattered with RailClone, displacement maps made the rest of the job at render time. Snow covering the models came from a material blend using a mask generated from a Groundwiz texture.

Substance result in Mental Ray
IV – Texturing
This is the step I enjoyed the most on this episode. Indeed, I created and learned new workflows I could use to speed up the creation of some textures and materials.
Procedural
Apart from a few bitmaps, Xmas balls textures are fully procedurally generated with the help of a composite material using 3ds Max maps: Ramp, checker, tiles, etc.
That way, many materials could be created and modified in a matter of minutes.
White plastic brackets are made of a blend from procedural and normal bump to handle the deformation of thin parts of the object.


Bitmap2Material & Box mapping
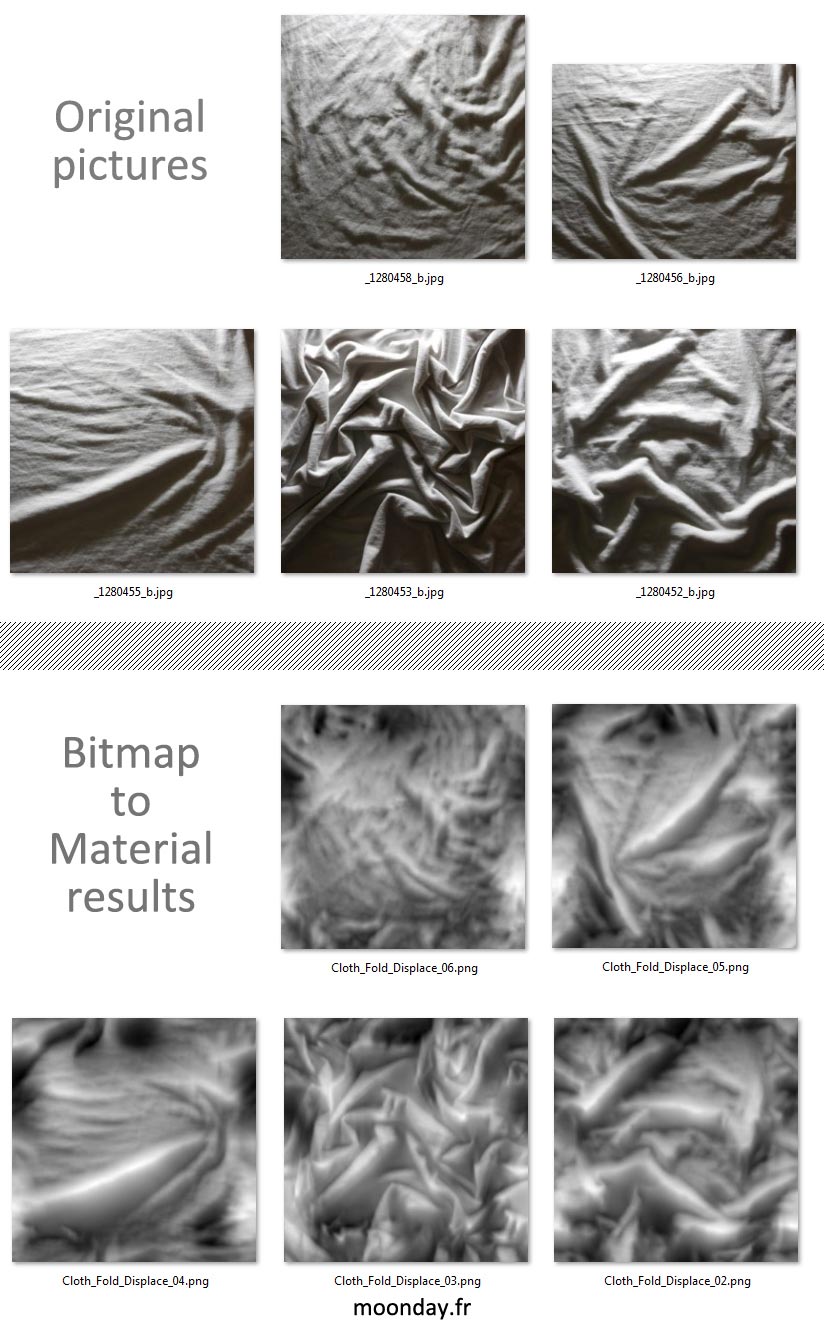
With so many elements to texture, I had to create some tileable texture pack used on almost every objects: grunge, finger prints, dirt, scratches, etc.
Some came from pictures processed in Bitmap2Material to extract displacement and normal bump informations.
By placing a light close and a camera at 90° from the subject, a more or less creased fabric, the “slope based” option from B2M computed believable displacements. Not 100% accurate but it saved a valuable time compared to the Normal Map photography by Ryan Clark method.
Finger prints and scratches textures were the most used to control the overall surfaces glossy and bump aspects.
As there were many simple geometry elements, unwrapping was not needed, a simple UVW box mapping was enough to quickly texture meshes like on wood furnitures.


Lazy Nezumi
Adding details in texturing process is now my fetish. Lazy Nezumi allowed me to quickly draw fabric seams, like on kid’s hat, using constraints like “sine” to create wide triangular seams.
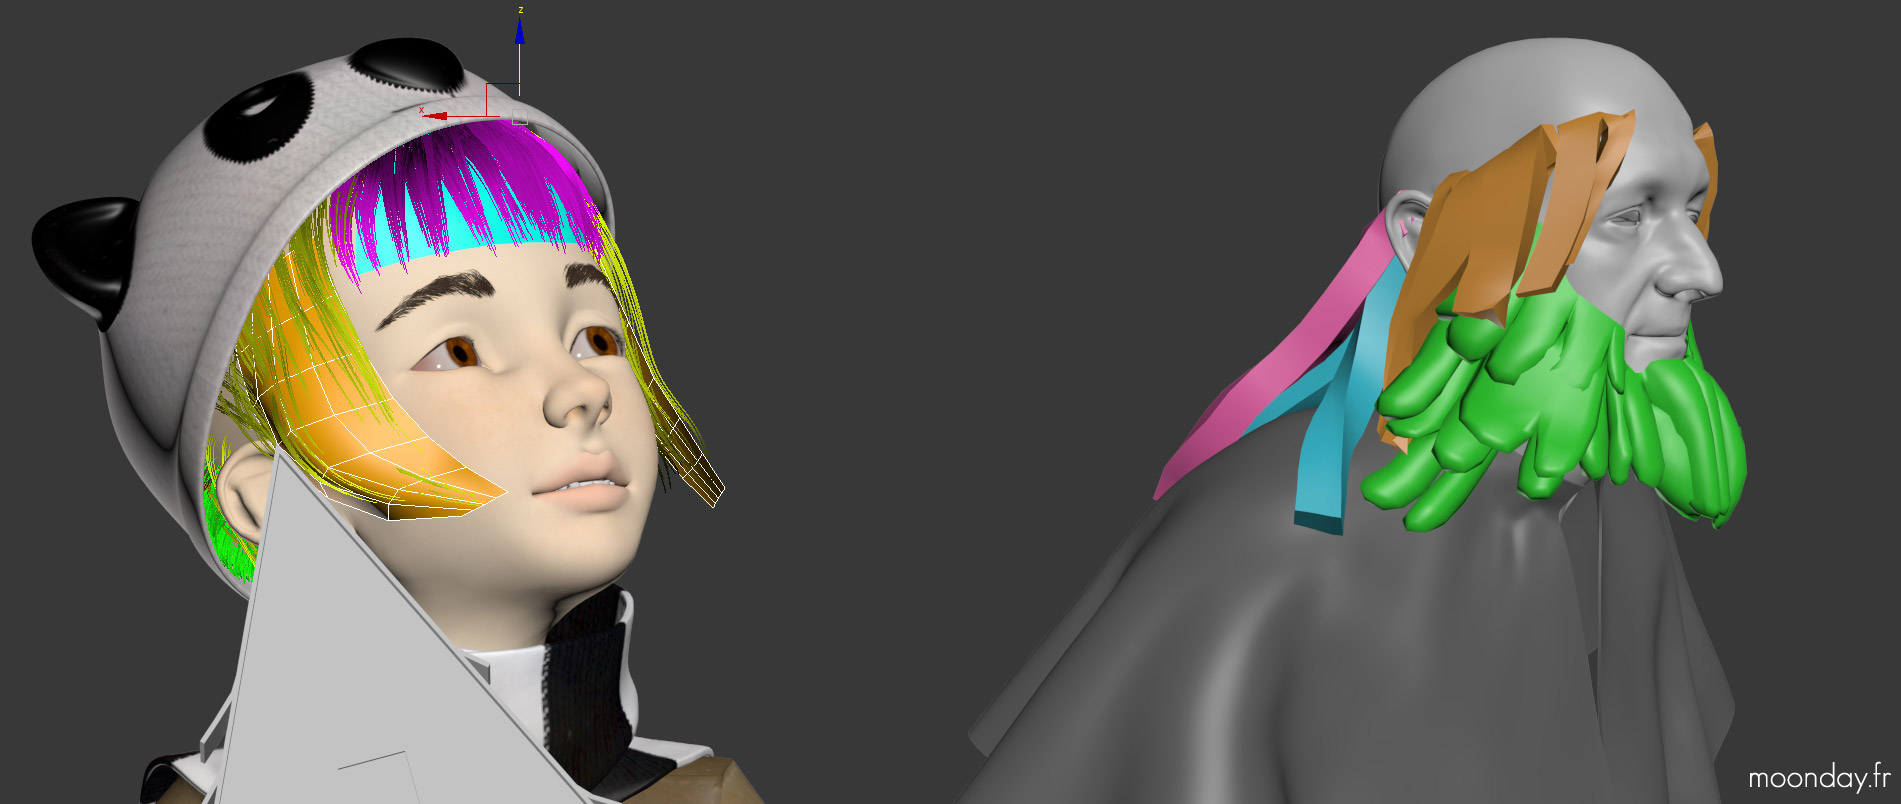
V – Hair & Fur
About hair process, I used the workflow established on earlier episodes, updating some processes.
Before jumping in pure hair creation, I took some time to think about the many designs of the main character’s hair. I 2D painted different hair styles over the model WIP head, based on Japanese stylised haircuts drawn by Ilya Kuvshinov.
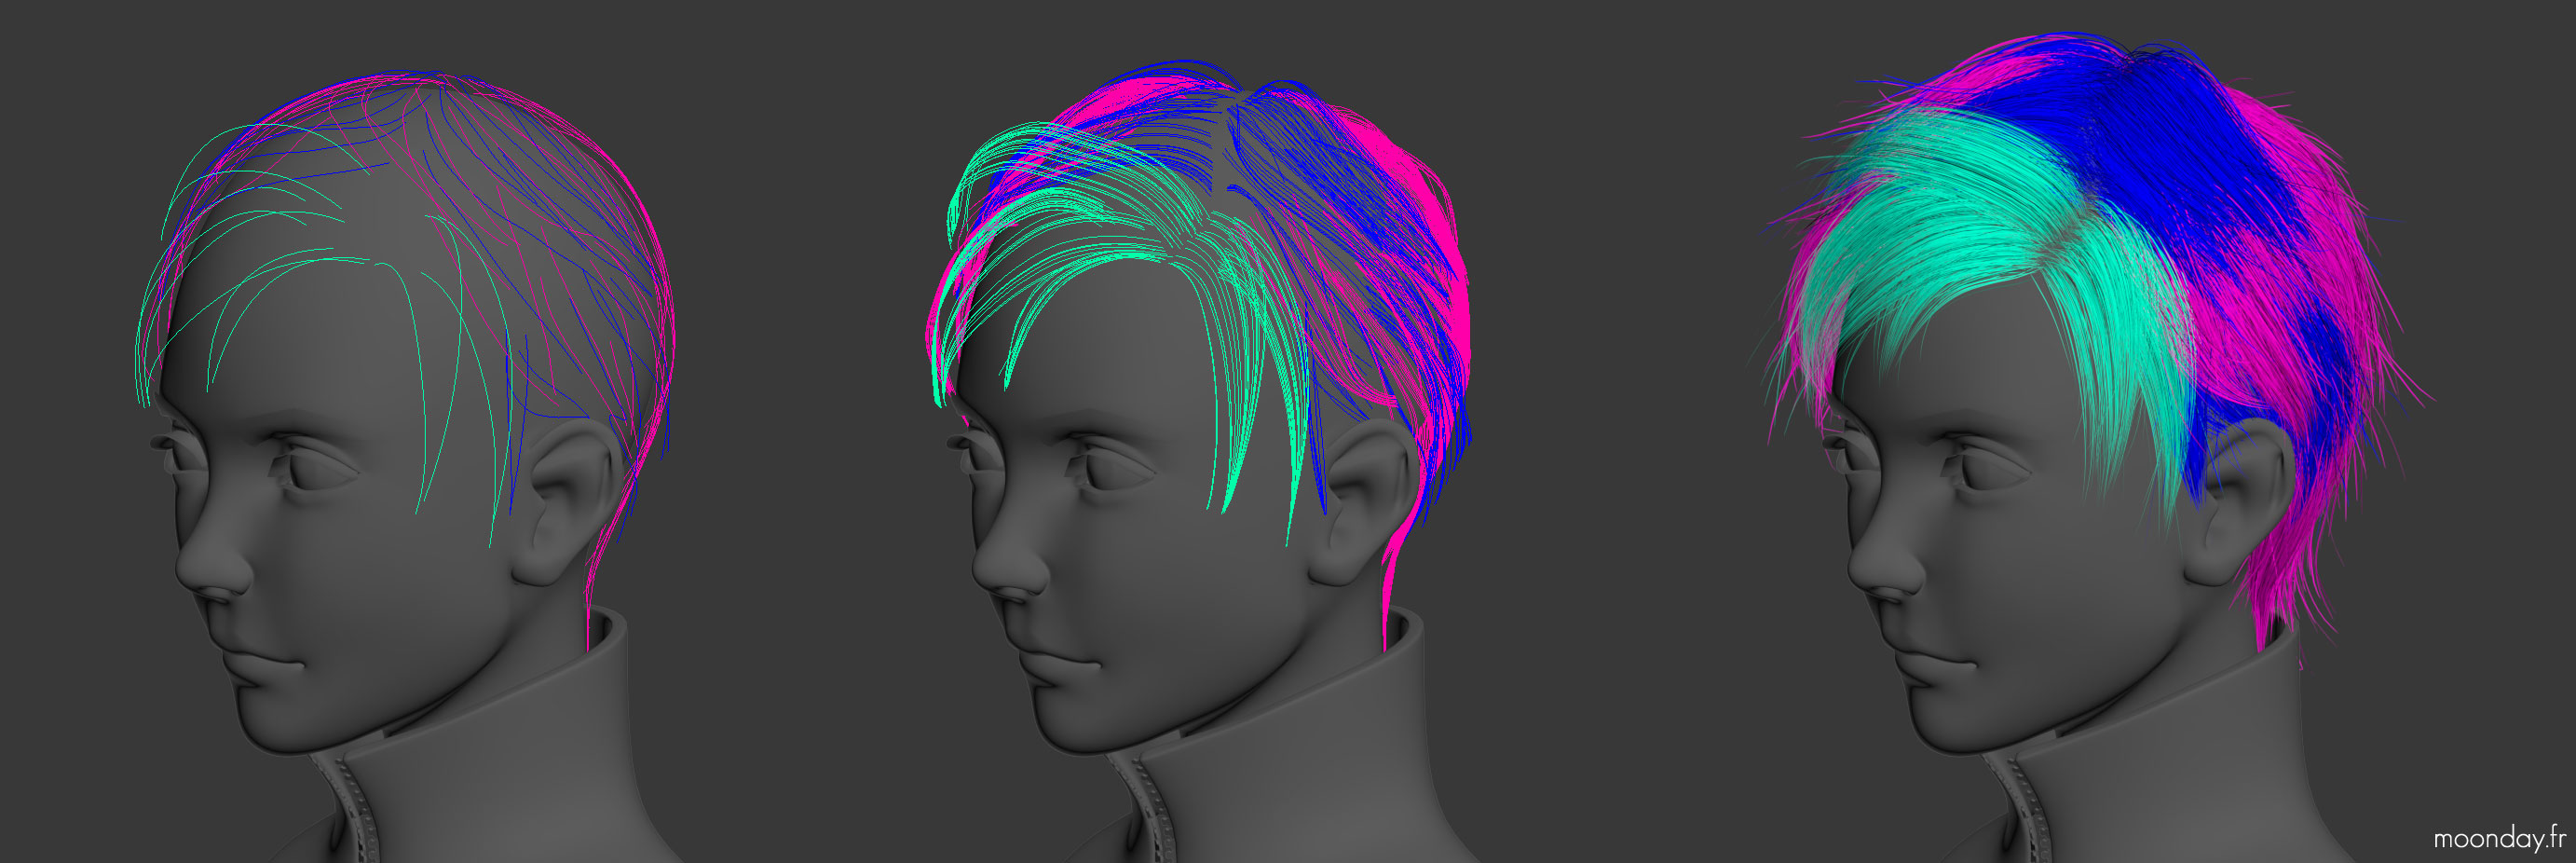
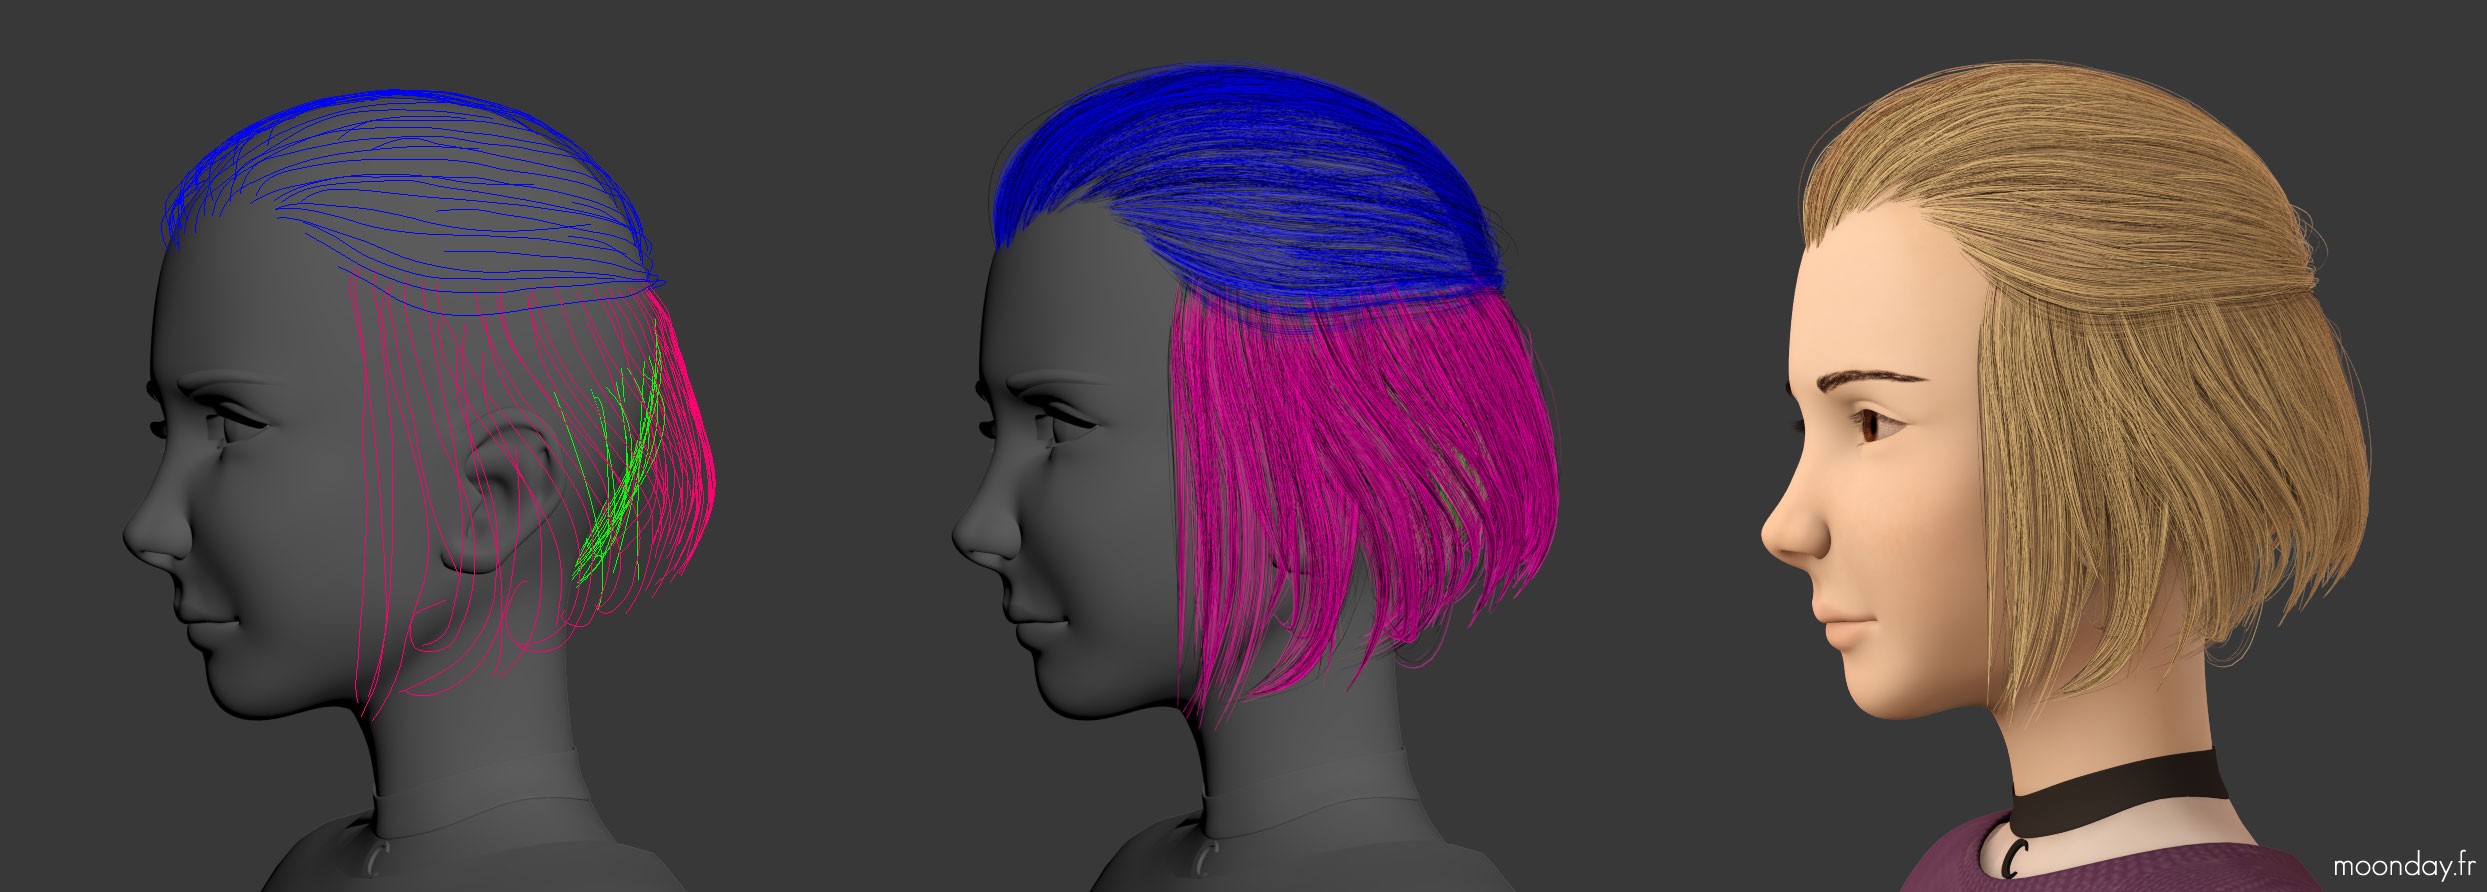
FurGuides Painter has been my best friend on the project.
Guides has been painted over temporary hair sculpts or directly on head skulls, then for women haircaps, I added Hair Farm modifiers: wisps, frizz etc. To create the main hair volume.
Using the paint of hair sculpt models method, I directly faced a problem, first vertex of each guides didn’t touch the head skull, instead of manually moving each one, I asked my friend GJ if he had a solution and he came back to me with Hair², a maxscript fixing the issue.
On the brother model I chose a different approach. After guides creation, I added a Hair&Fur modifier to generate more guides between original guides from FurGuides Painter, this method create flat strands of hair then I add Hair Farm modifiers.
Creating hair following this method simplified and optimized the animation and simulation processes.
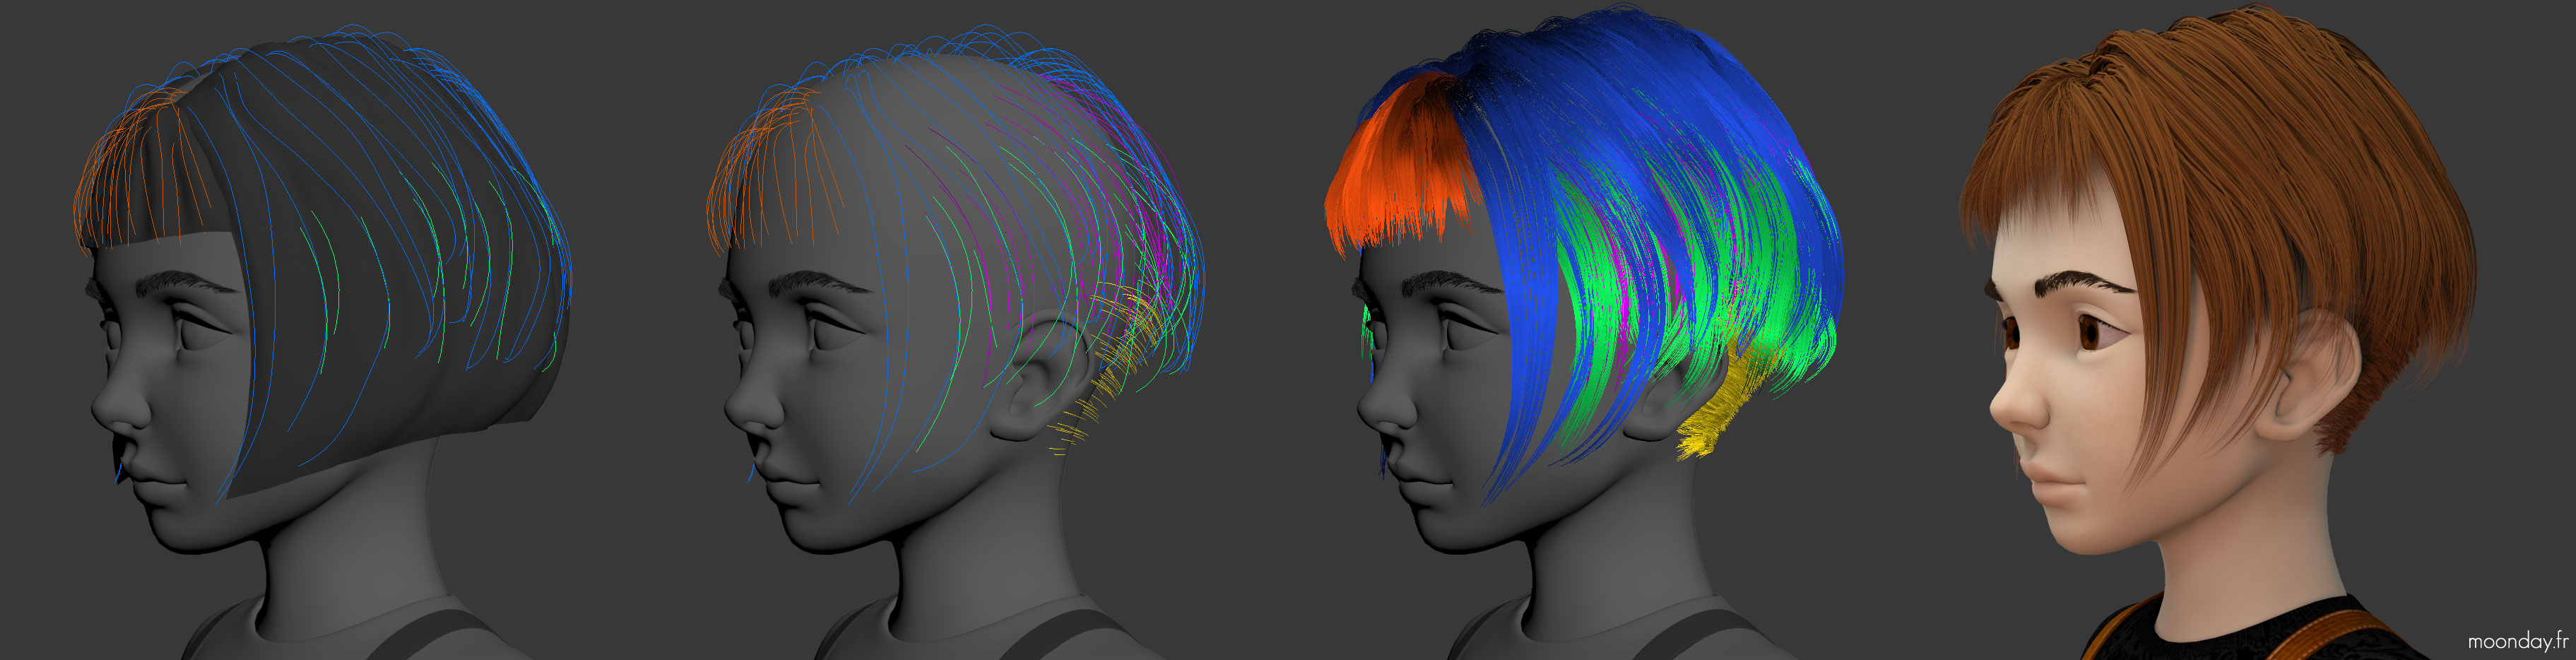
Main character
Brother
Mom Bredeles
Hair² demo


VI – Animation & Simulation
for 2015 episode I decided to put mocap a few feet away and go back to keyframe animation as I want to increase my animation skills. Some bad things here and there in the film, but overall, the experience was conclusive.
Each animation was shot on camera to get a good rhythm reference, I also started from the storyboard and the camera motion preview to get strong bases. Key poses have been extracted from the video to create a pose to pose animation, then I filled the gaps with keyframes and adjusted the shot length, shot global rhythm and camera path.
Simulation
Simulation of hair, beard and clothes of St Nicolas
We can see in the heroin’s drawings and turntable that she is wearing a short dress that evolved in a long dress in the film. The reason of this transformation was at simulation time, when the girl was on the floor, lighting up her Xmas tree, the dress was too short!
Therefore I had to improvise a longer dress model to cover her knees and a part of the floor. No major issue during the simulation of that second version of the dress except a few more simulations with different settings on the shot the main character is jumping in the window frame to prevent the dress passes over her head.
Clothes simulations of St Nicolas & Hans Trapp
Hair
Hair was driven by cloth simulations. As hair are basically generated on spline cages, they were skin wrapped to low poly geometries representing the global or per strands volume.
The main character had 2 different hair models created, one for indoor shots and another for outside shots when she wears her hat. Each model were separated in many hair parts: global, strands, fringe. Working with divided parts of a hairstyle made the animation process more easy, even more when you’re dealing with long hair.
The most complex simulation was for St Nicolas hairs, at the time the model was created, in 2012, nothing was really optimized. However, the character beard simulation was so smooth and flawless, it looked like a dream to work with.
Simulation geometries
VII – Render
The film was entirely rendered in Mental Ray and 3ds Max Scanline render engine. During some preview render, iRay help me to see how the light would react in the scene. It may sounds weird but using iRay engine helped me to better understand Final gather and light bounces in Mental Ray.
Environments
Taking most of the time to be computed, environments were the first elements to be rendered. When camera motions weren’t too complex, some backgrounds were camera mapped to avoid long render time, sometimes up to 1 week per passes. Example: 1st shot, all the Christmas market was rendered as a still image and then projected over low poly geometry, this background was then rendered in a few minutes.
IBL & Final Gather
Most of the shots used IBL, photometric lights and Final gather with multiple light bounces (up to 7 for indoors). Characters also used Final gather passes with the FG map write and blend option turned on to give a smooth looking indirect light on the meshes.
I passed time on some lights setup, like the kitchen scene in the middle of the film. Originally there were much more lights in the scene, I finally decided to remove the unnecessary ones to keep a more intimate mood and also lower render time.
The kitchen scene marks a temporal change in the film. As we left the heroin in a sunset environment, when we left the “Bredeles apartment”, night is already installed. The film could take place entirely in the night but I did not want to miss the many colours and mood a dawn can offer.


Hair
This year I finally had THE workflow to render hair. During Mental Ray render passes, hair and fur were present but invisible to the camera, only projecting their shadows on other geometries. Hair render passes, 1 per light rig, were done in Scanline and then composited in the image. Apart from a few crashes in 1 or 2 scenes, the methods works until the end of the production.
HDR & Final Gather
Houses indoors were lighted by HDR textures.
I captured 360° HDR images that I projected on boxy rooms inside the houses models, Final gather handled the rest of the job at render time.

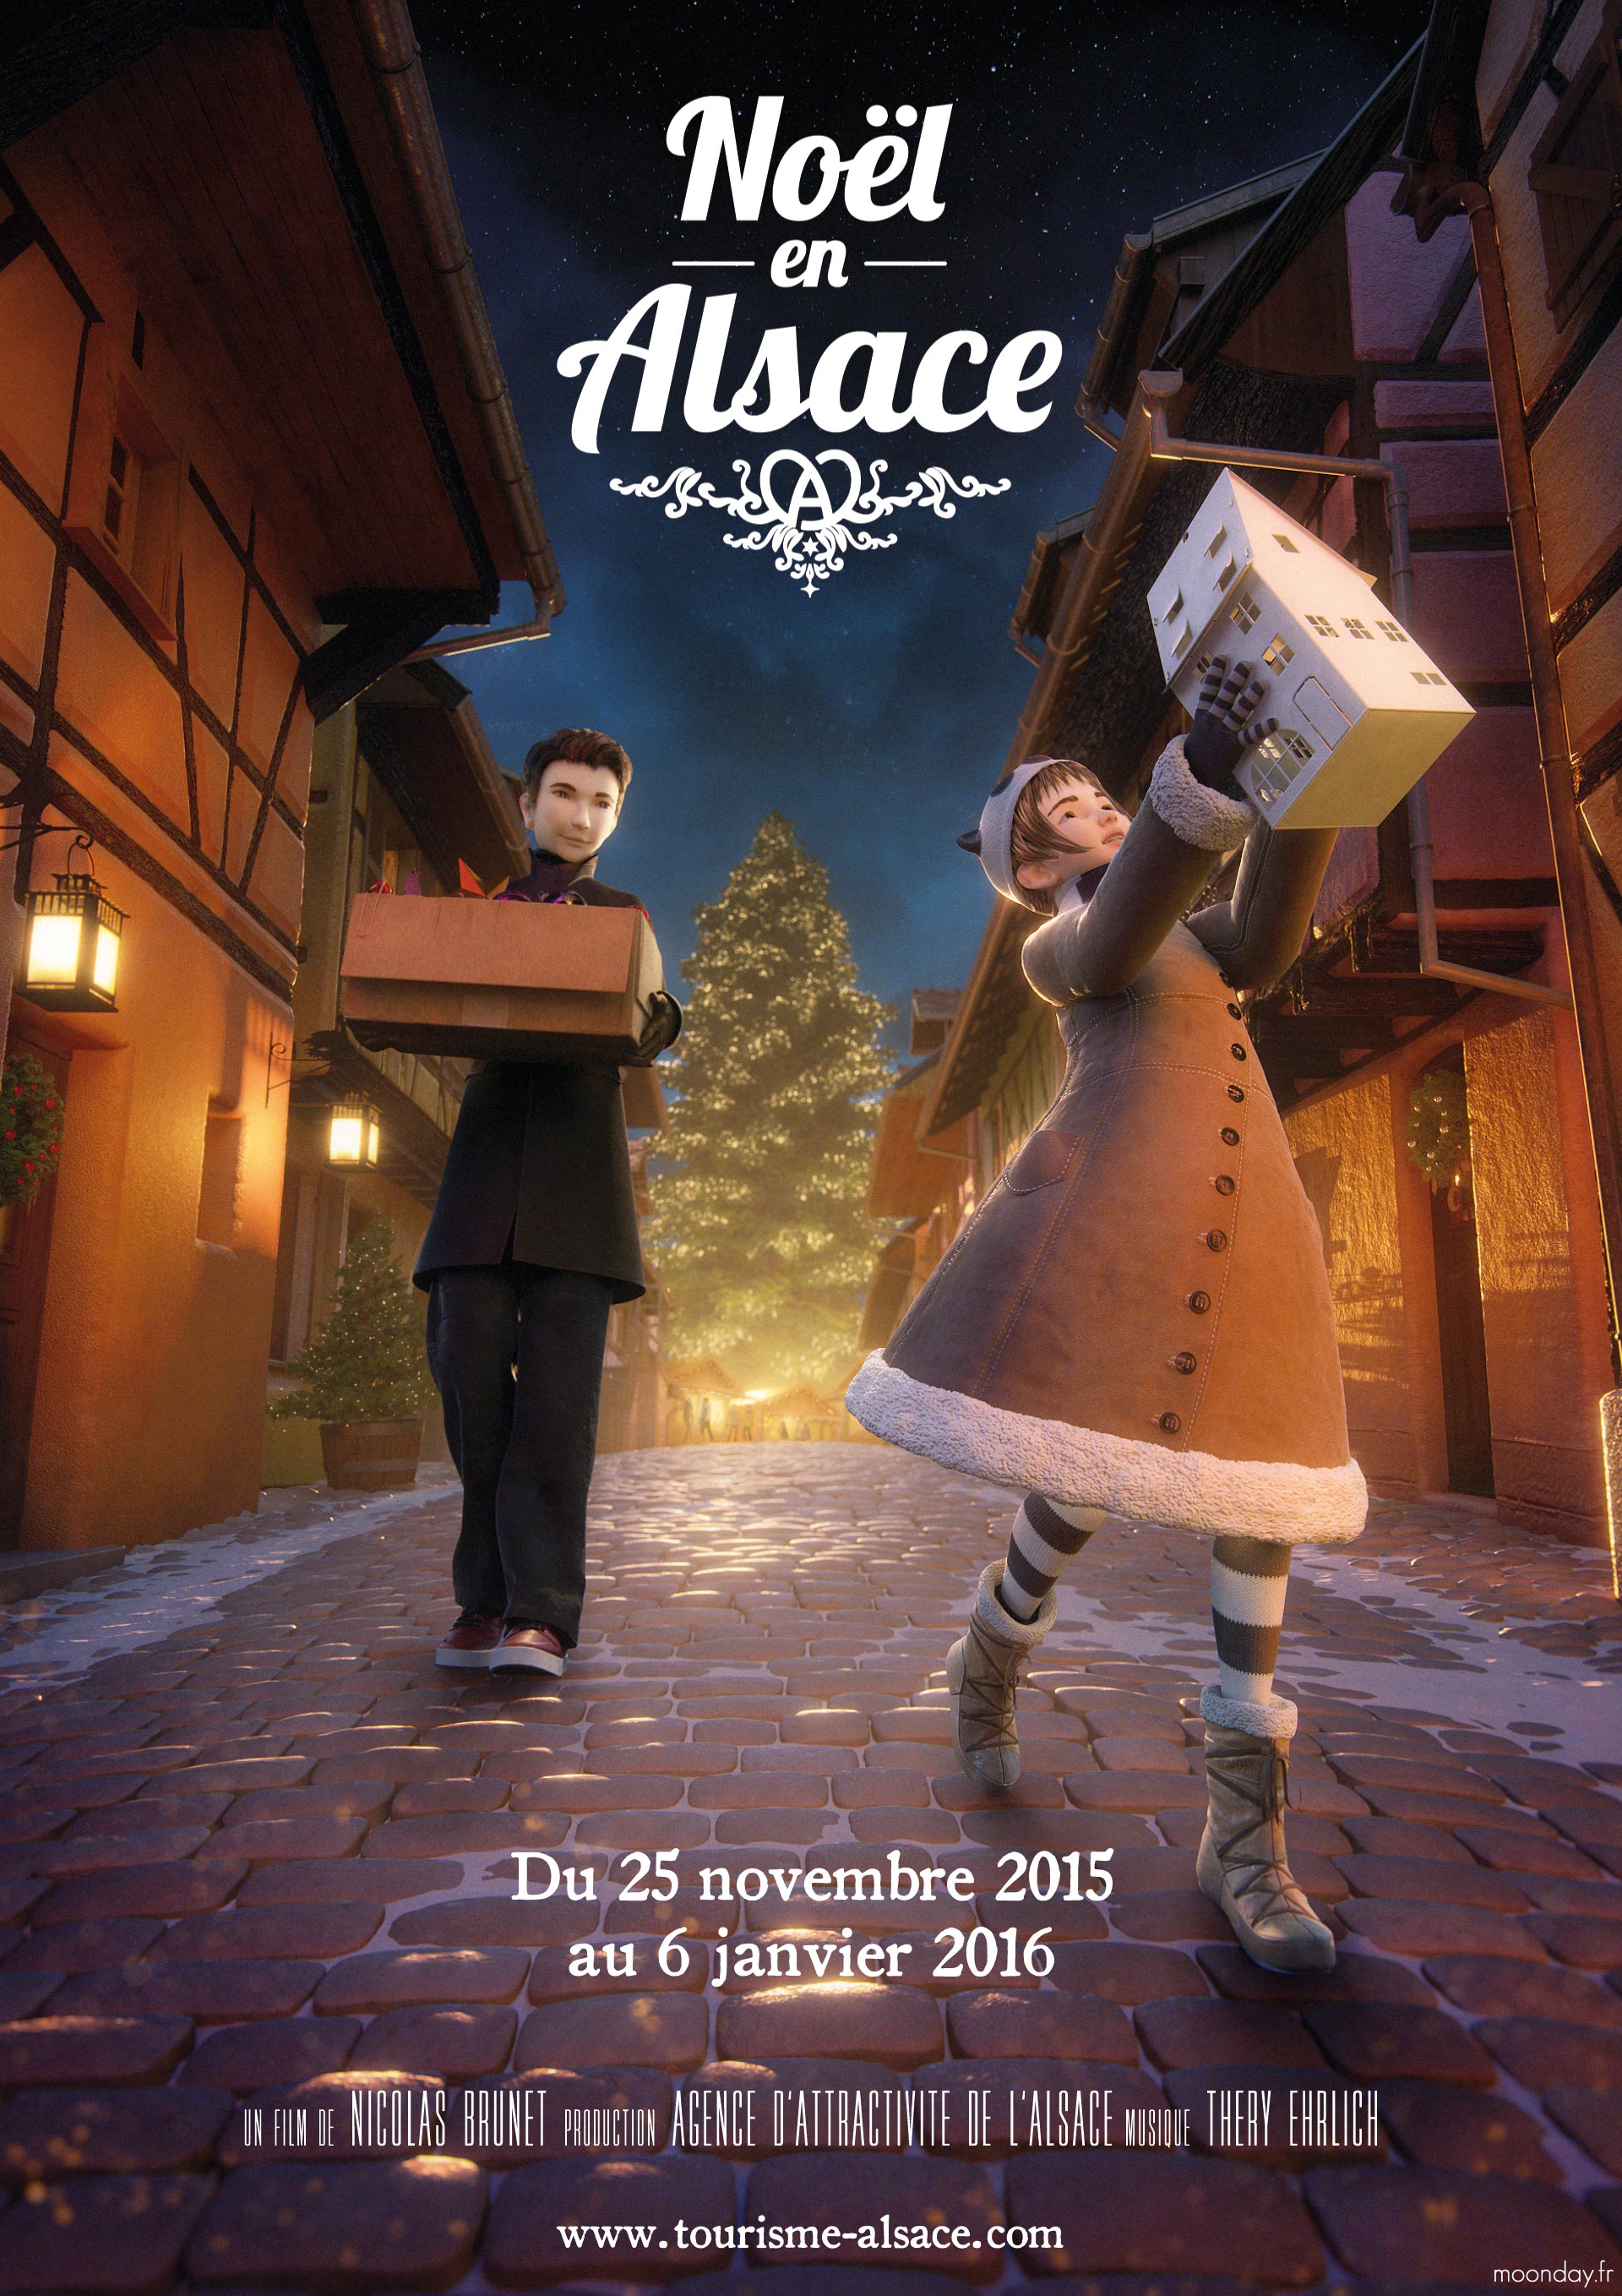
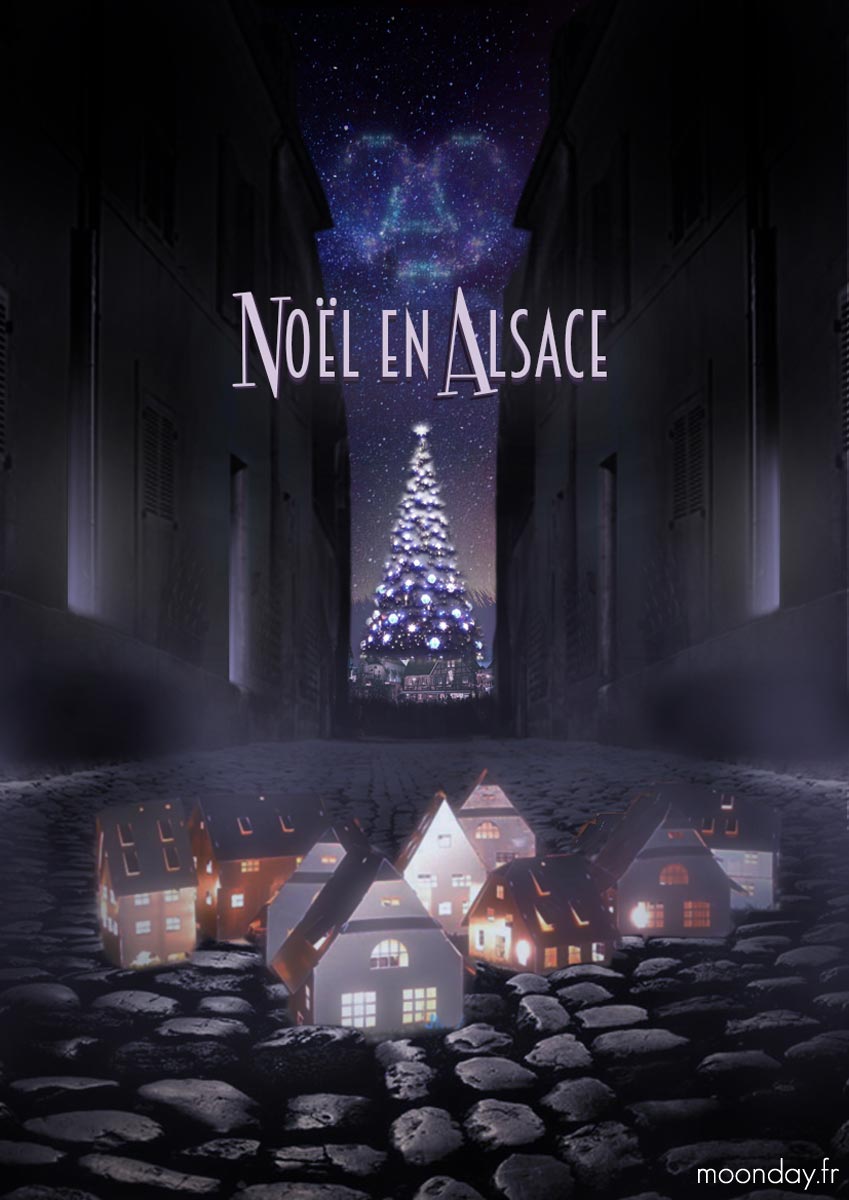
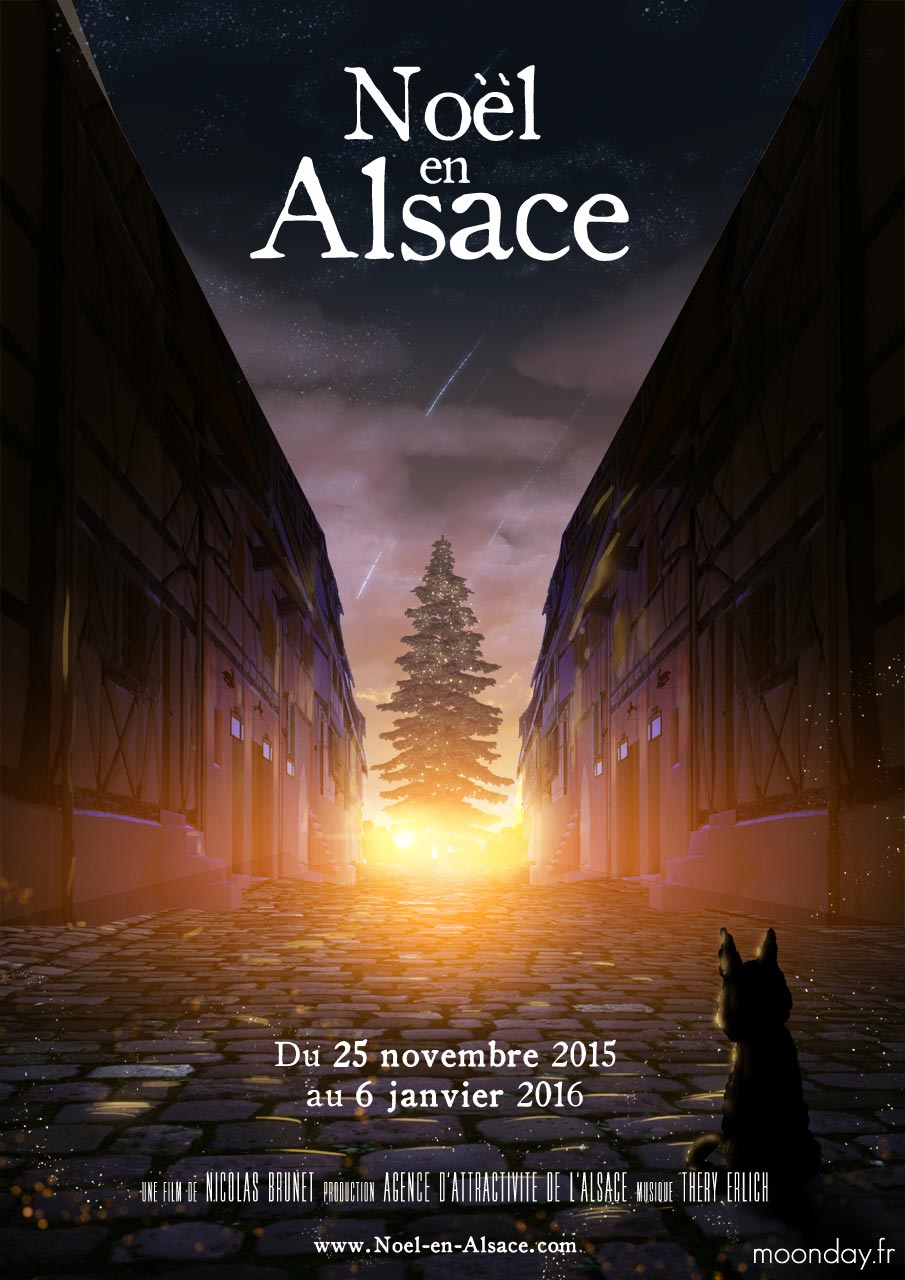
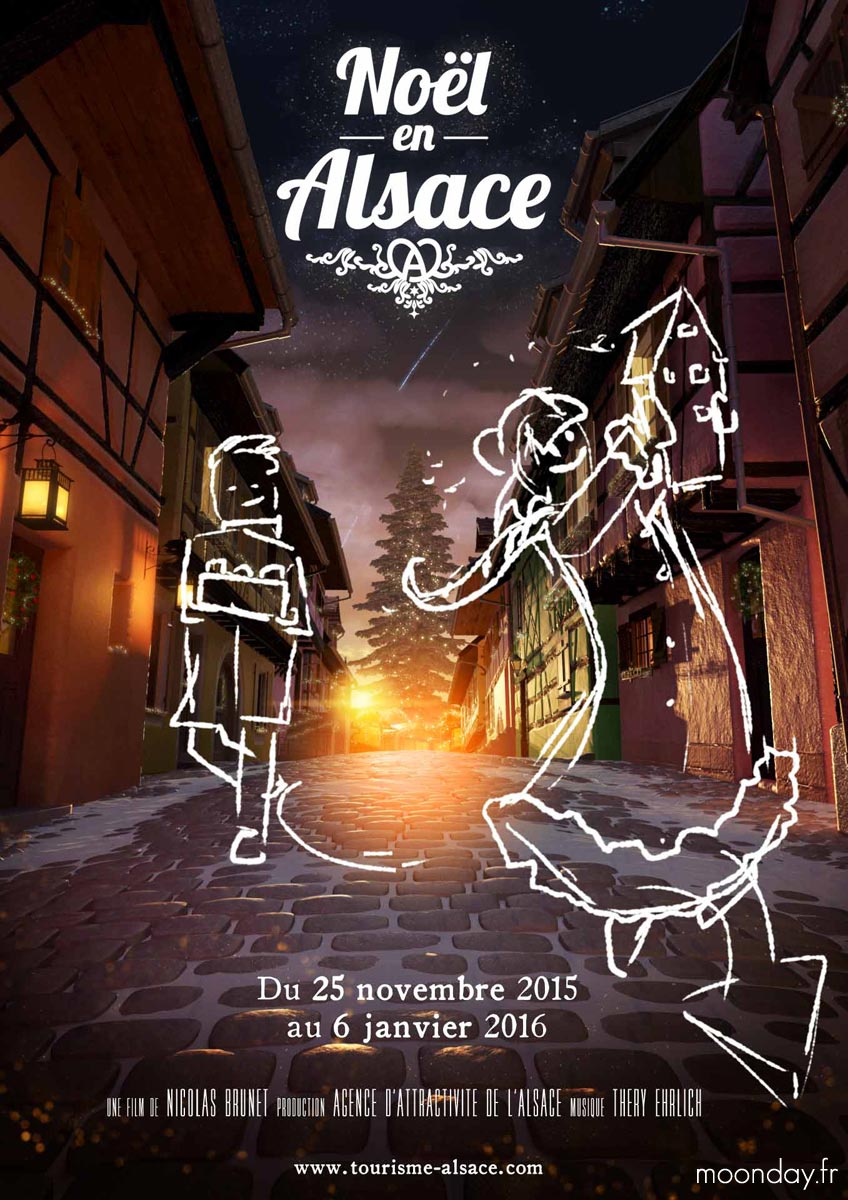
VIII – Poster
We sent 2 propositions to the client, one focused on the big Christmas tree and another more focused on the film itself.
For the selected proposition, Gaylor and I have been simultaneously working on a simple idea, then we pooled our designs together and they look very similar. If the action of the film has been entirely on night time, I would have chose Gaylor’s concept and I’d have added characters like on the final concept of the poster.
After putting main assets and base light set up, Alex Alvarez gave me good feedback and comments I followed to adjust the global colour and mood of the image. In the end, the poster is way more coloured than I initially imagined.
IX – Music & Trailer
A penultimate chapter dedicated to people without whom the project would not have been possible. I’d like to thanks Thery for his participation and availability on the project, he listened to my choices and demands about modifications, we could find compromises and in the end he composed 3 tracks, 1 for the film, another for the trailer and a last for the short version of the film.
Another huge thanks to Kevin Rolland who take care of the DCP conversion of the trailer for theatrical release and, in the same time, he shared his knowledge on the subject with me.
DCP check at cinéma Bonne-Garde, Nantes
X – Conclusion
As usual, at the end of a project “if I had more time I could…” Well, I would improve many things! Animations, rigging, etc. But surprisingly, I’m proud of that 2015 edition, which is a rare feeling when I end a commissioned project, maybe because this time, the story and universe was really close to mine. Worst, I feel I can jump on a new short film project right now! (Never forget I’m the kind of guy that love to unwrap 3D meshes)
Wajdy Aboshkewa, Harald Goetz, Alex Alvarez et Guillaume Depestèle respectively gave me a hand on modelling, animation and scripting, I’m very thankful for their help!
Finally, despite the delays due to the vagaries of the electricity fairy and crashes during render times, the film contains a few Easter eggs, more or less hidden and more or less personal, I invite you to comment on the video or send me a message, it will be the opportunity to ask me questions if I missed an explanation about the creation of the film.
Here is a video comparing one of the countless previews and the final film: