Get the model
For this project I used a very old 3D model of a clone troopers I made a few years ago. Once I found the correct heroic pose, I fixed some skinning mistakes with the help of mesh select and relax modifiers on problematic areas of the model.
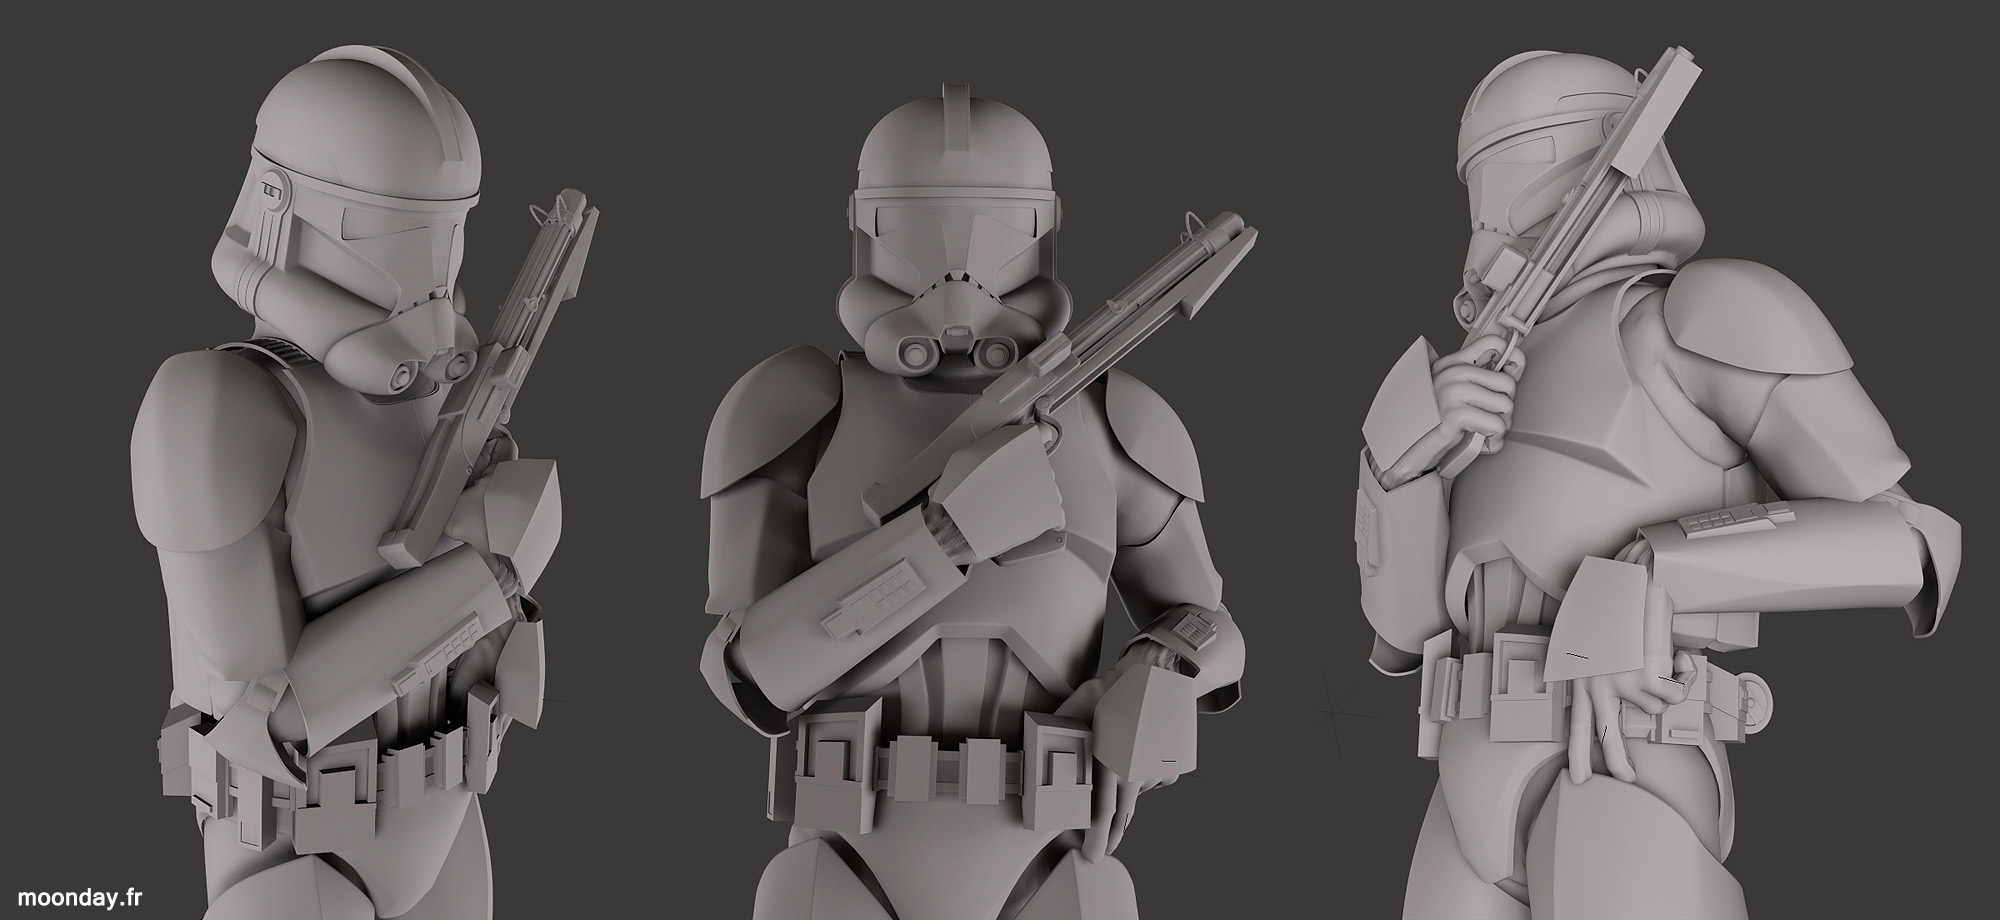
Shaded model before mesh issues fixed
360° HDRI Shooting
As I wanted a very diffusive light but with strong reflections I used the HDRI way to light up the scene. A GH1 + Fisheye lens on a panoramic head helped to quickly capture a forest environment. Depending on the stitching software you use, you’ll need more or less overlap between photos to avoid manual stitching work.
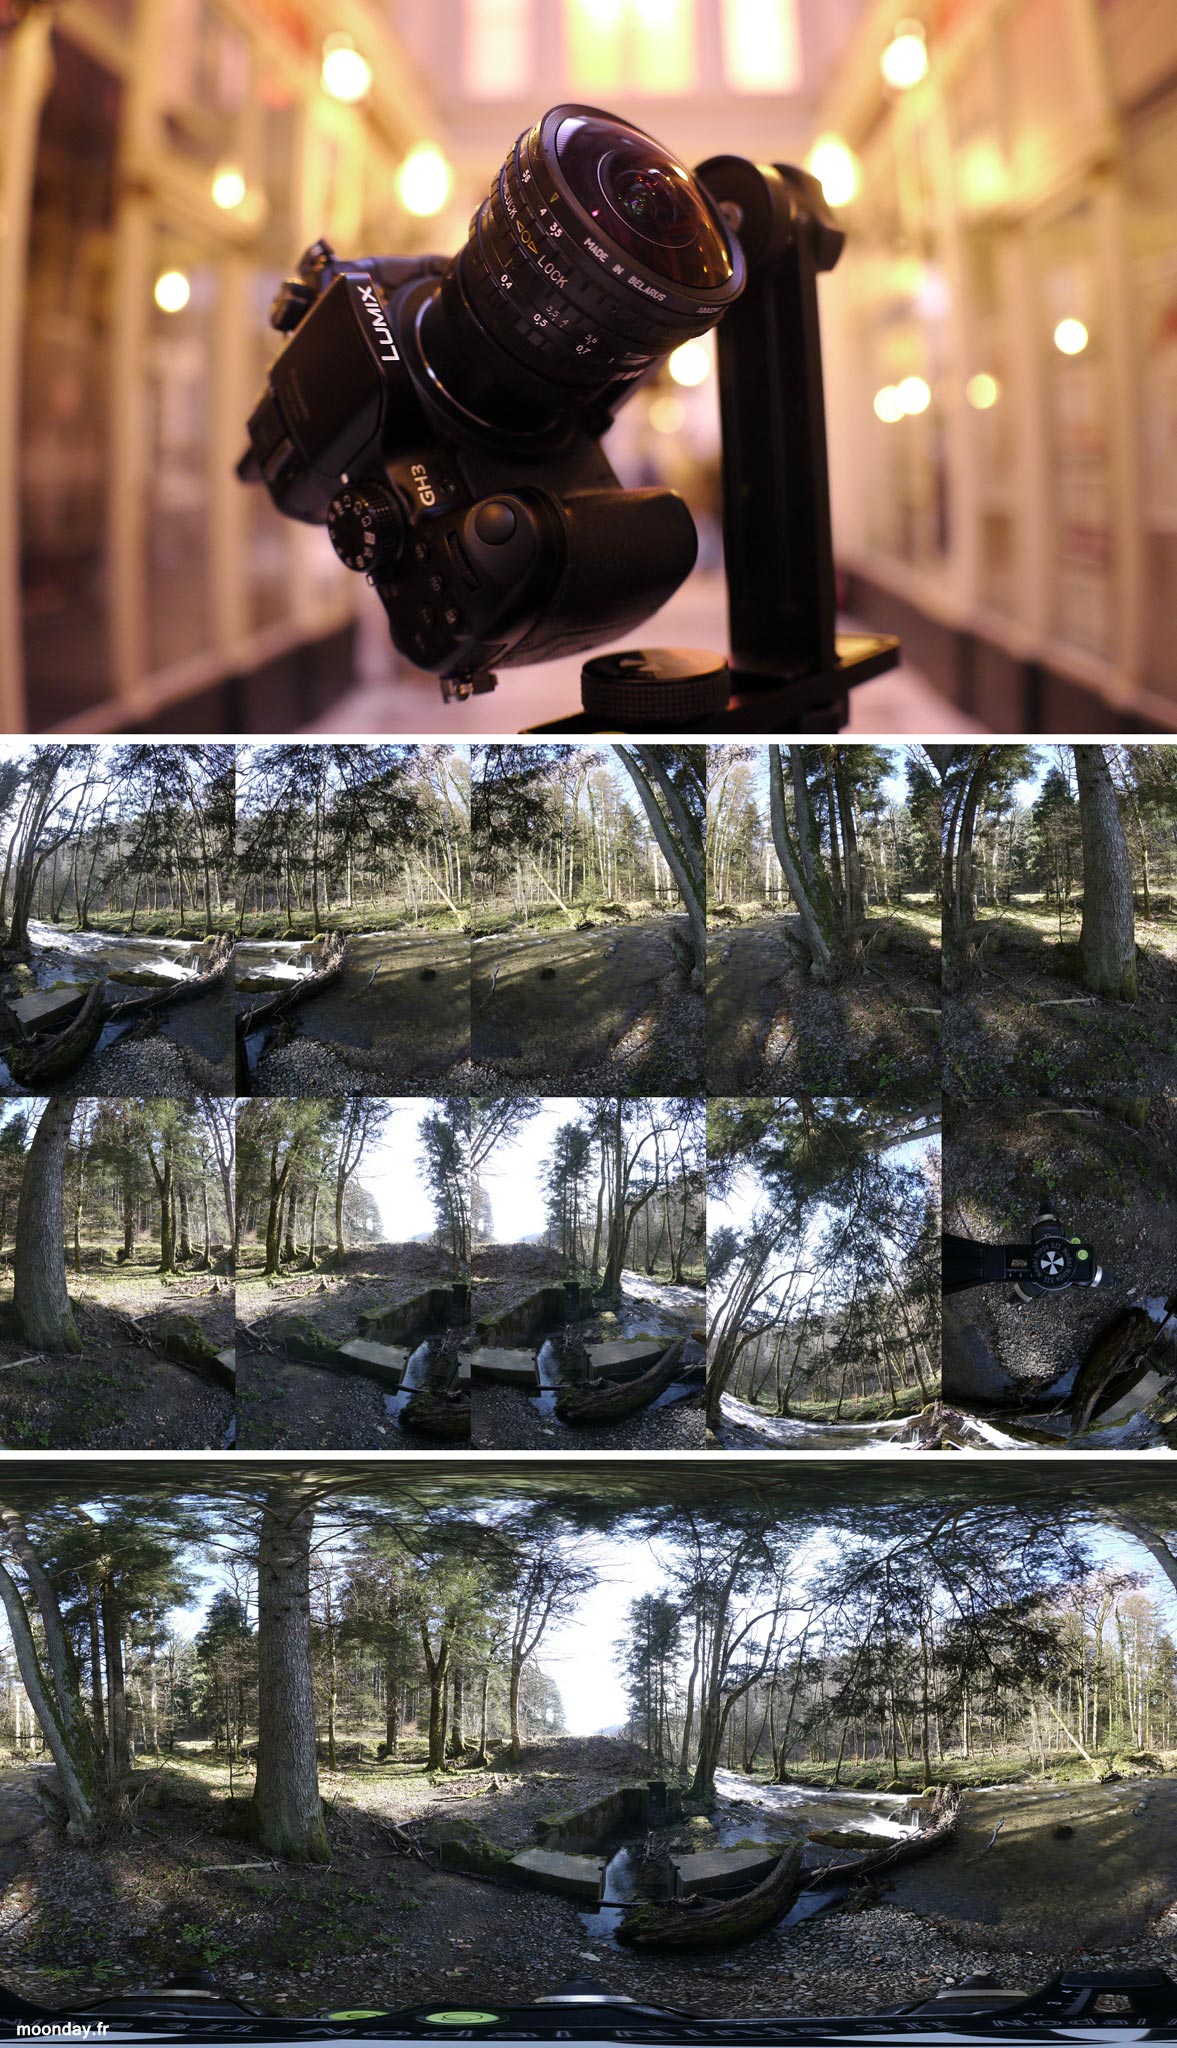
Top: Shooting material – Middle: 1 picture taken every 30° + zenith and nadir pictures – Bottom: Result
Render time
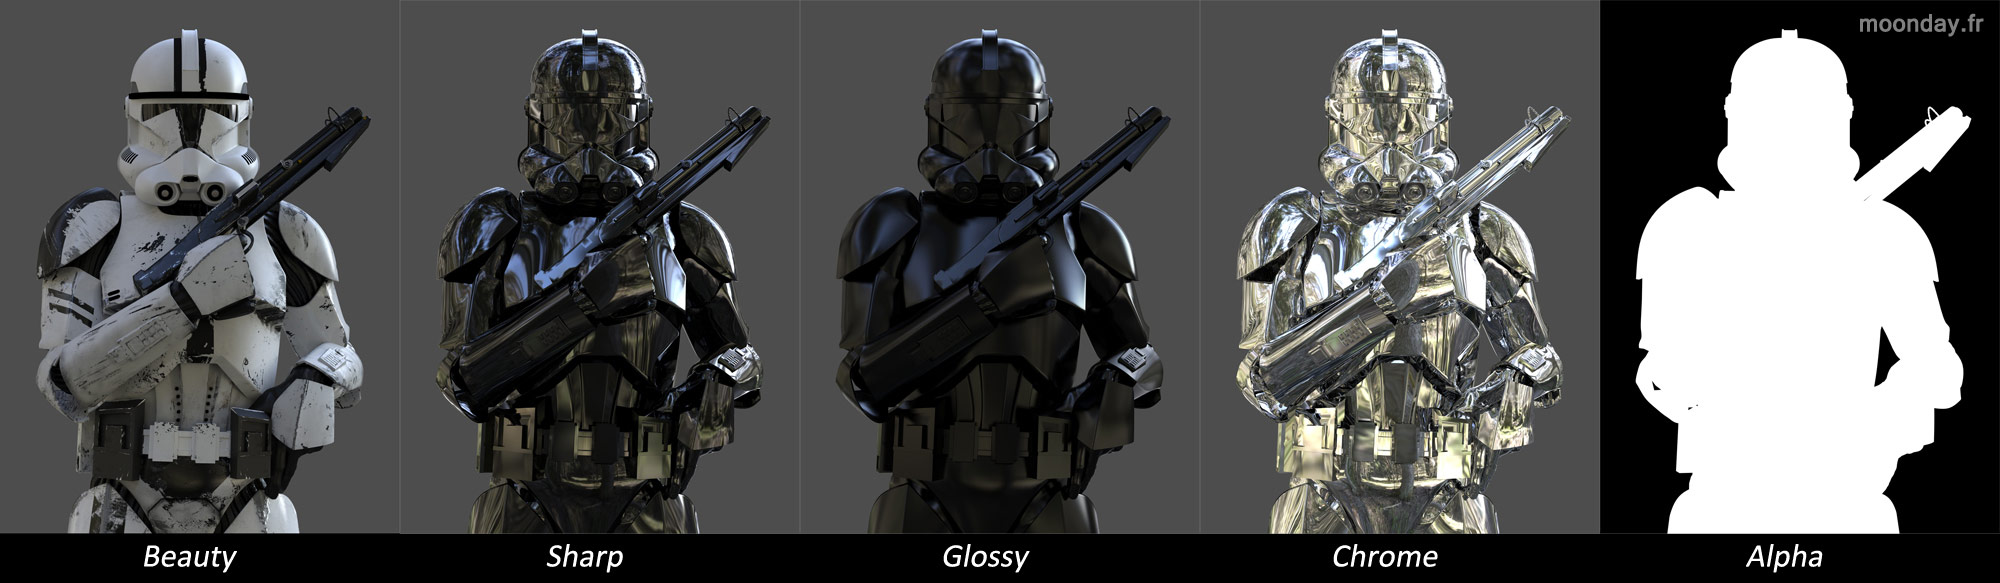
My camera could shot up to 7 stops of light I merged together with HDR Fusion function in Photoshop. As the render engine chosen for the project was iRay, the 360° HDRI was loaded as environment map in 3ds Max. Then I rendered out several passes, Raw/beauty, a sharp and glossy reflection and finally a chrome shader applied to the whole mesh gave the “T1000” pass.
Arch&Design shaders were used
Cleaning mistakes and adding details
Before loading all the passes in the composited image, I take some time to erase mistakes from bad unwrapping resulting in texture distortions. Details are added using custom brushes, metal chips, dirt and scratches that way the trooper’s armour give the feeling it has known many wars.
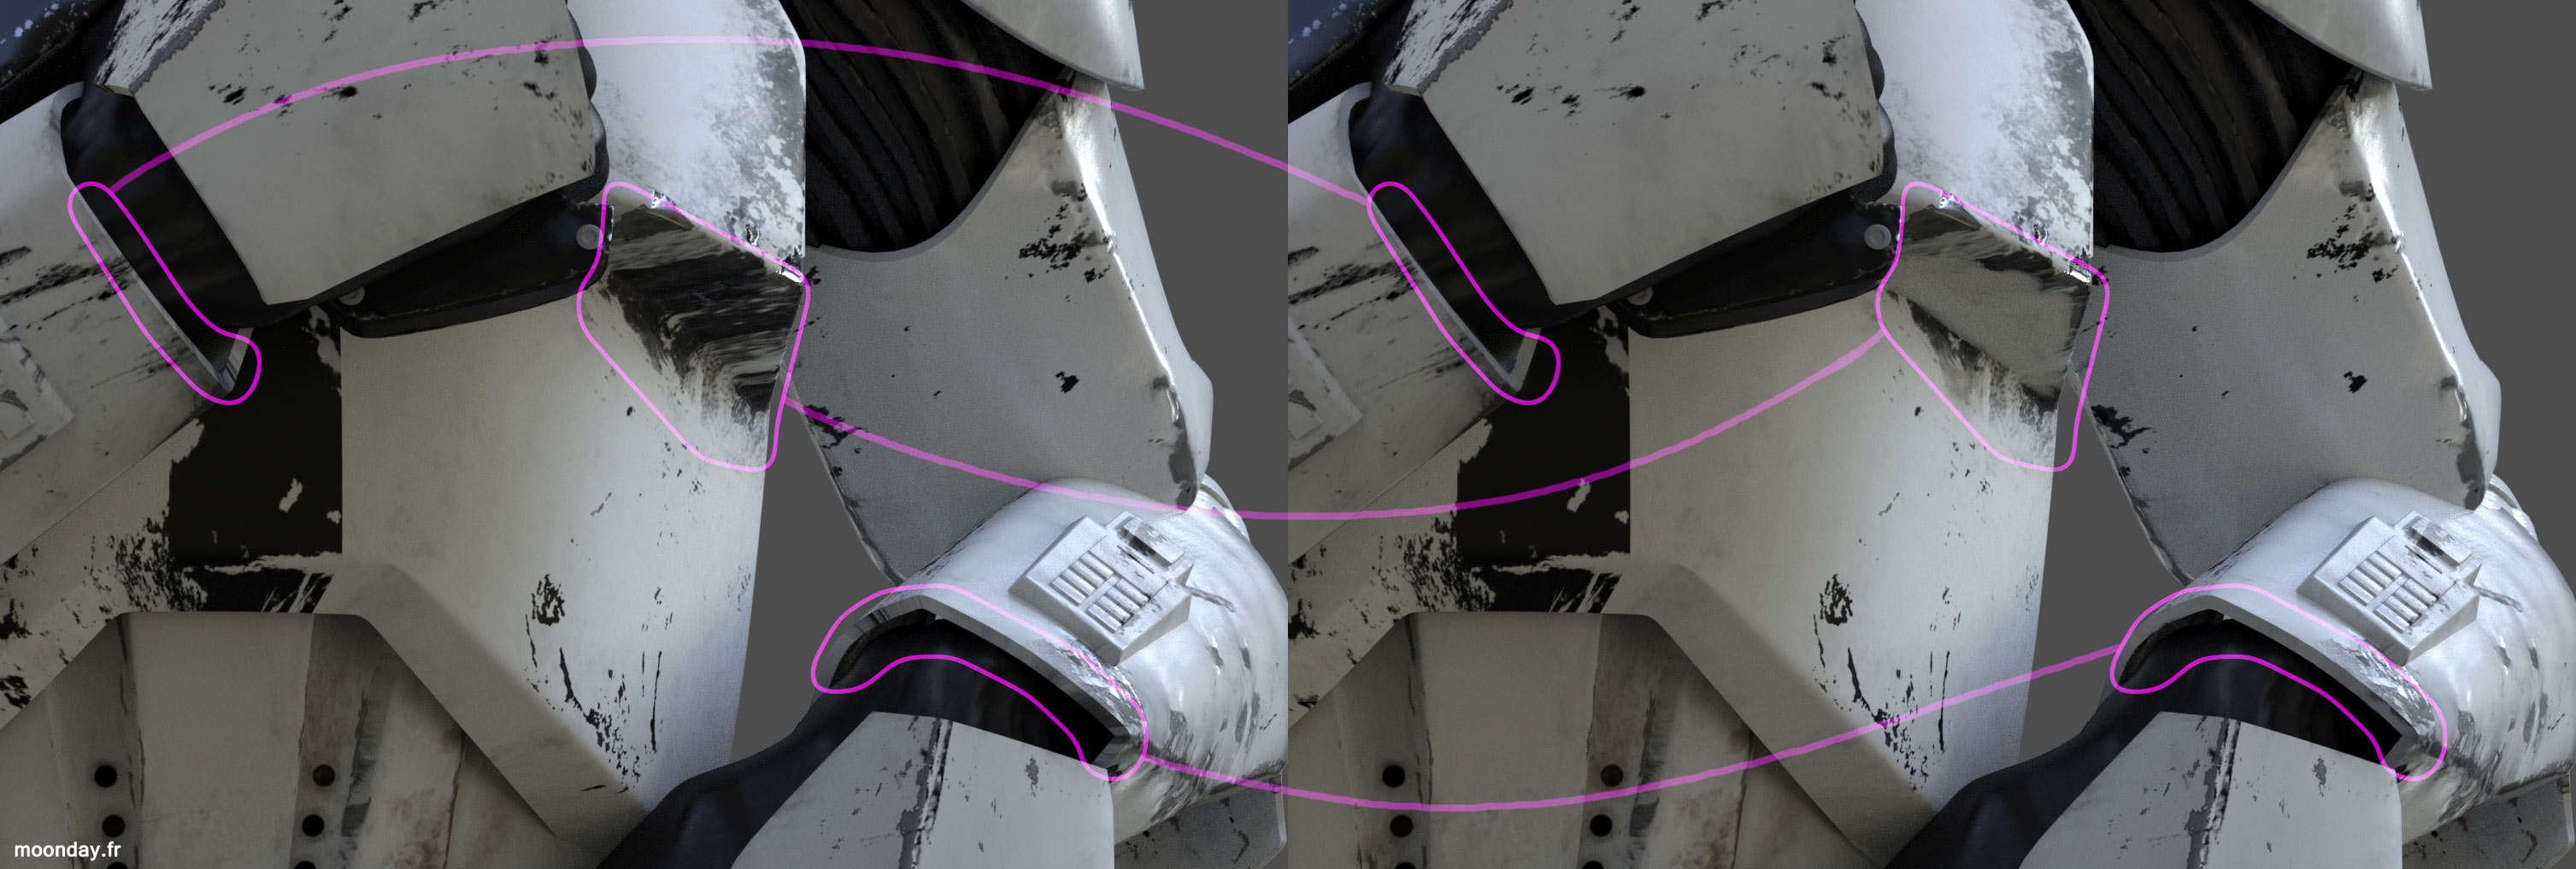
Left: an unwrapping artist you probably won’t hire / Right: fixed textures
Deeper but subtle details
Before leaving the paint process, always think if you can add more details without crushing what you’ve already done so far. That render was created to be featured as a printable magazine cover therefore I thought adding subtle details like tileable leather and dust/grunge textures would give more life to the armour and gloves. Do that on layers using soft light or overlay transfer mode.
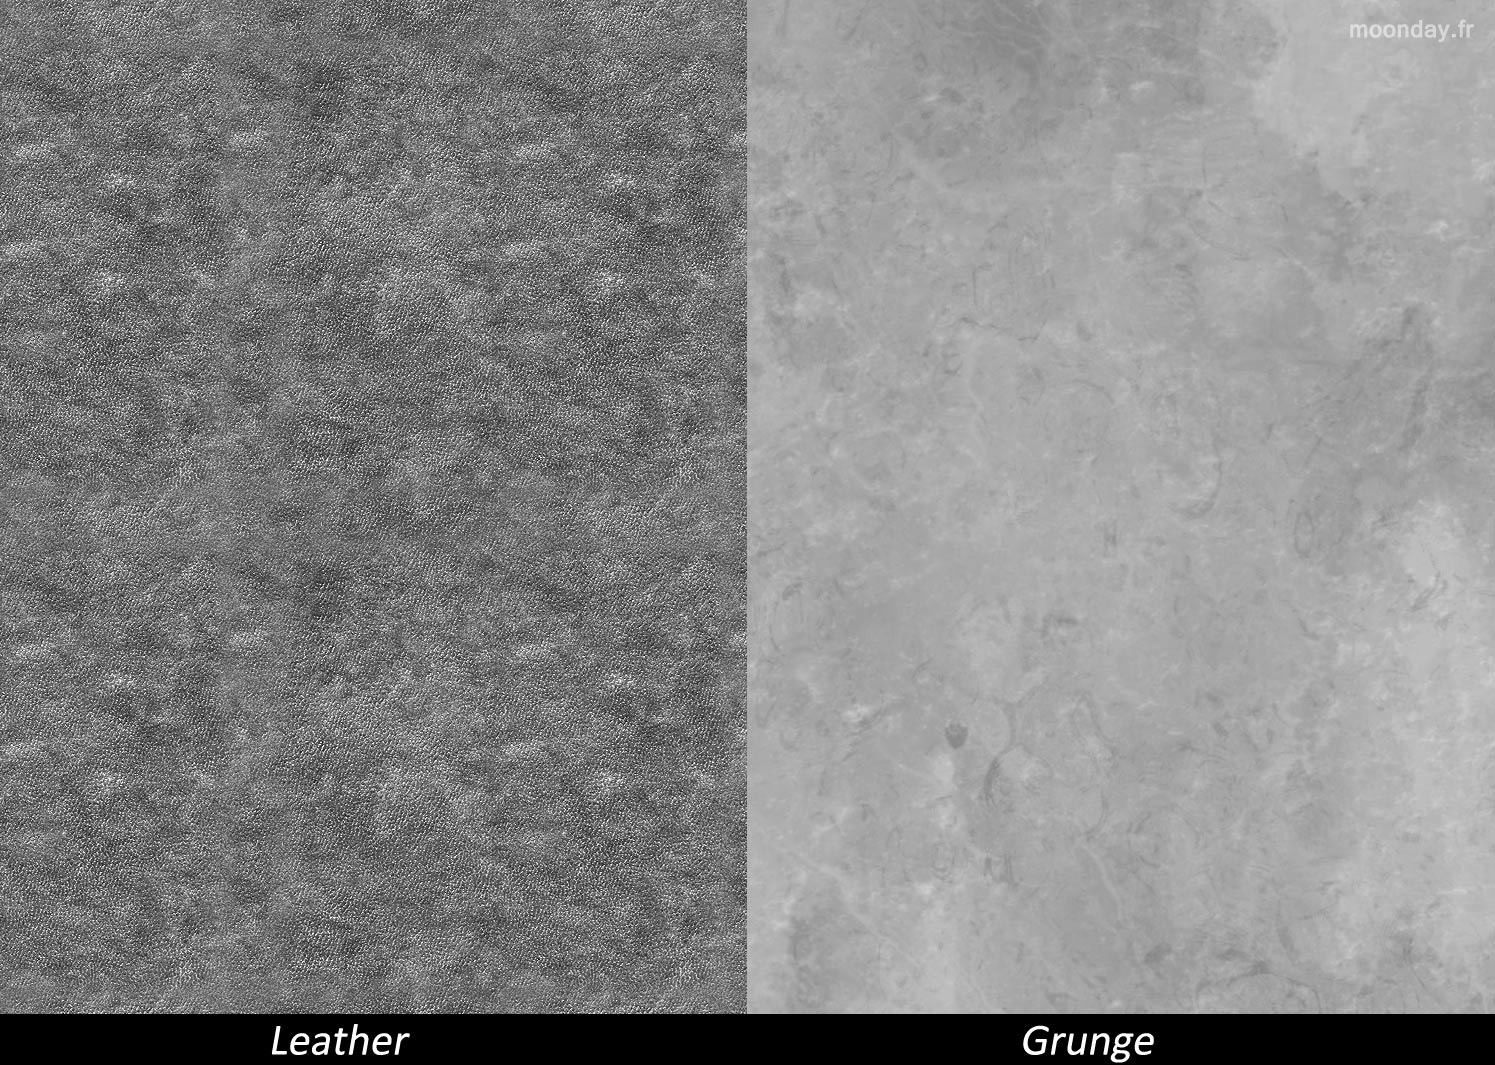
Be creative in your overlay texture choice, seamless & tileable maps are not always necessary.
Adding highlights
Now the model is clean, adding the different reflection passes rendered earlier will add more contrast to the image. The 3 reflection layers are set to add transfer mode, using masks I could tell the software where I wanted sharp or glossy reflections.

The different reflection passes with mask applied
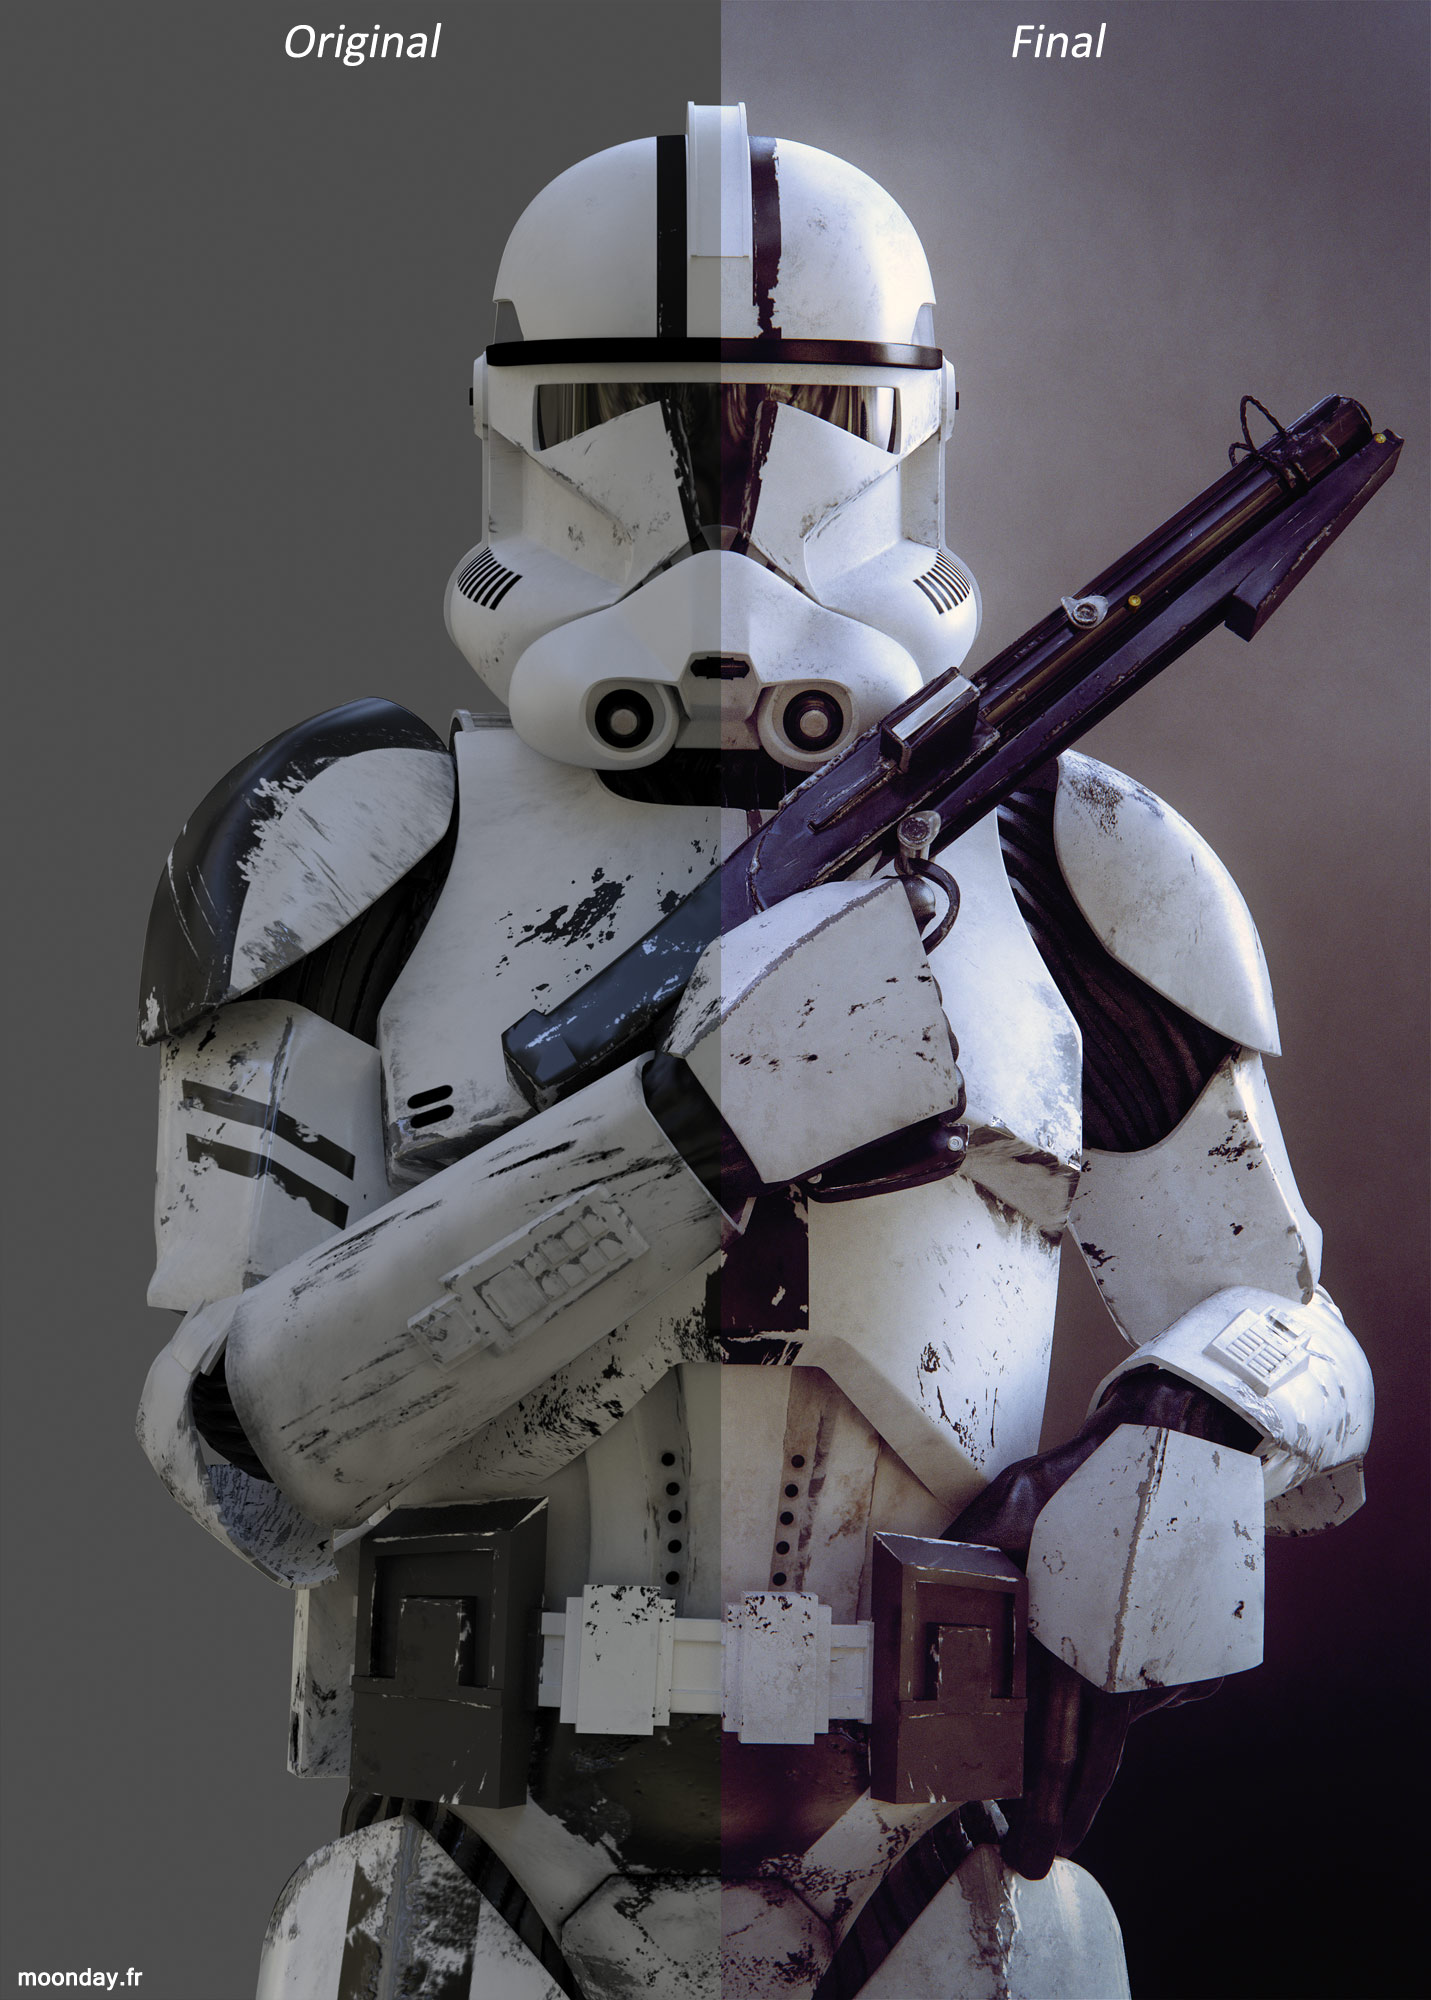
Final touches
The last part of the process consist on adding grain, vignetting, chromatic aberrations, colour correction and a light glow to give the feeling of a picture look over a CG render look. Never exaggerate the use of these effects, you don’t want to ruin your images with unwanted lens flares and extreme chromatic aberrations.